Behind the Scenes: How I Make My Magazine Sets
-
Hey everyone! I have had a lot of requests for this blog post over the years, but after some more people asking for advice on this topic I am finally making this post. Today's post will be about how I make my magazine sets, which are the standard type of set I make on this platform. I know a lot of people enjoyed seeing how I make my organized style sets so hopefully you guys will enjoy this tutorial as well! In this tutorial, I will also be tackling other smaller questions about my sets such as how I crop and manipulate items, but mostly overall process.
As always, this is just how I make my sets and there is no right way to make a set so feel free to do you!
 Lastly, buckle up because this one is going to be a longer one! I will be making a set primarily for the Statement Coats contest in my group Trending Today, however it won't be the only contest I use to base this set on. I usually search out about at least two contests that I feel would work well in a set together before I start and have the contests page open on a separate tab so I don't forget the end goal while I am creating.
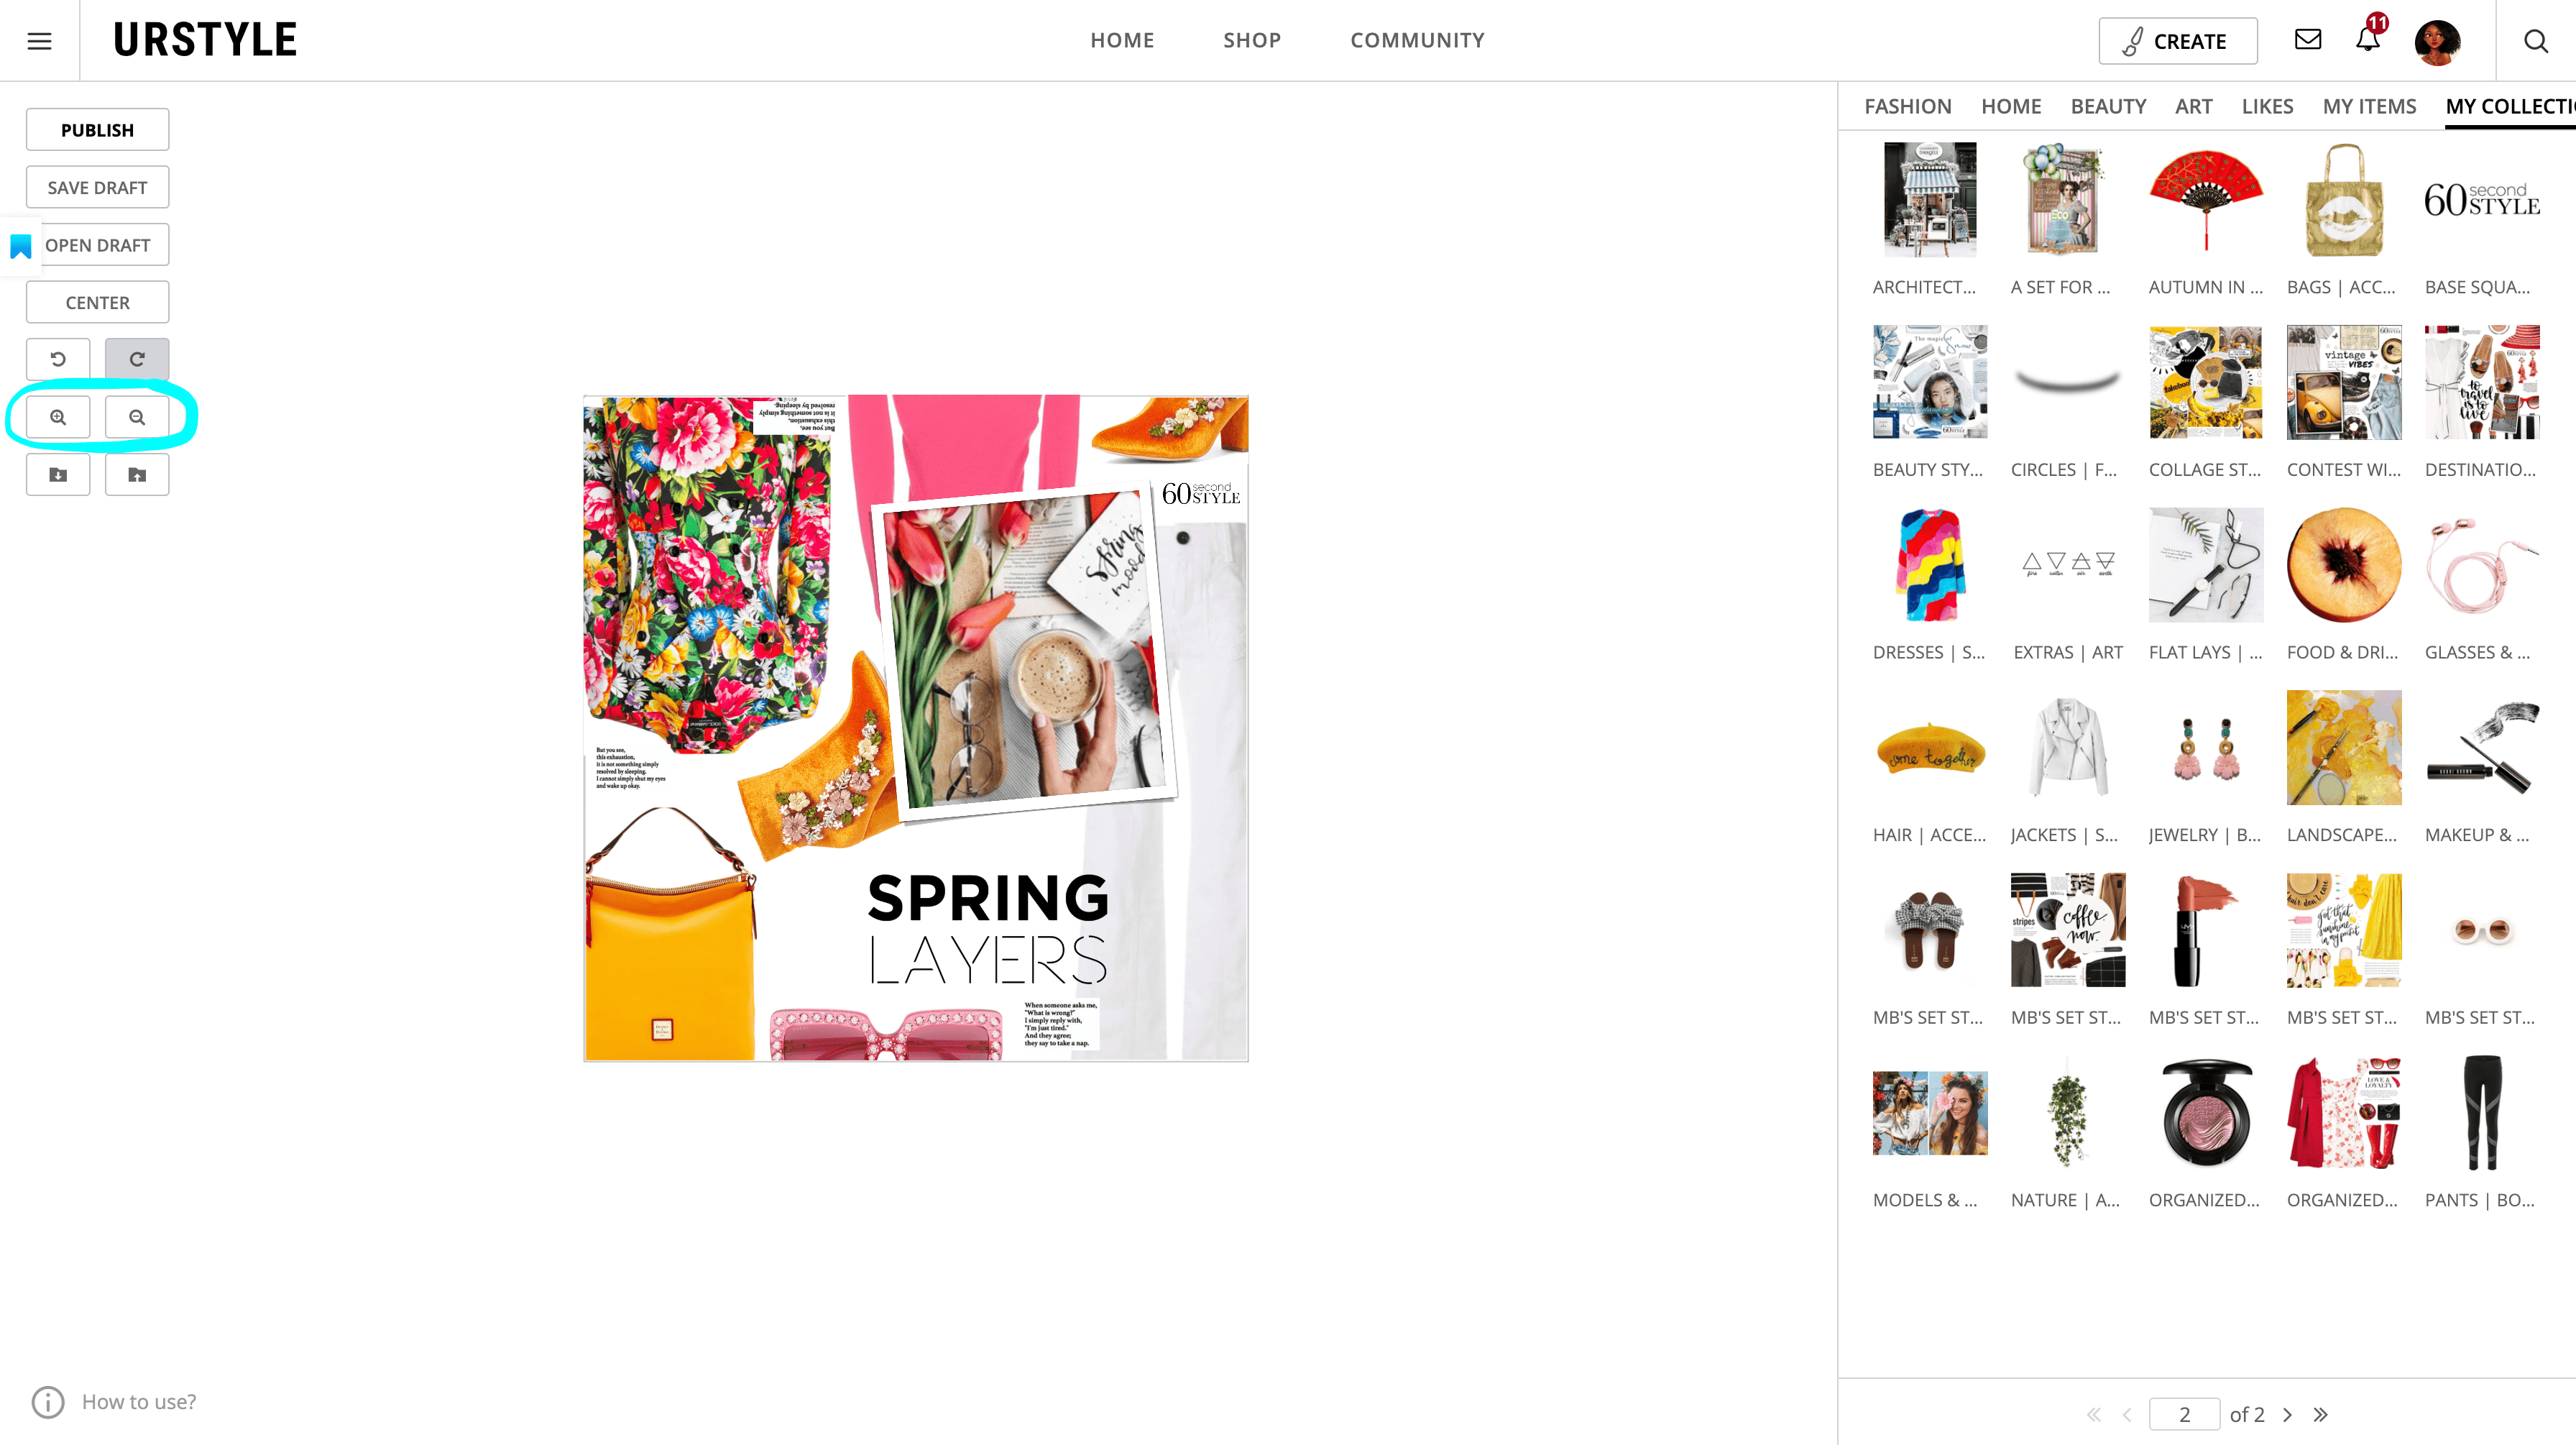
- I first start off with the base square frame that I use to make every single one of my sets. If you want to use this base square frame, it is in a collection of its own on my profile titled base square (https://urstyle.fashion/collections/106461)
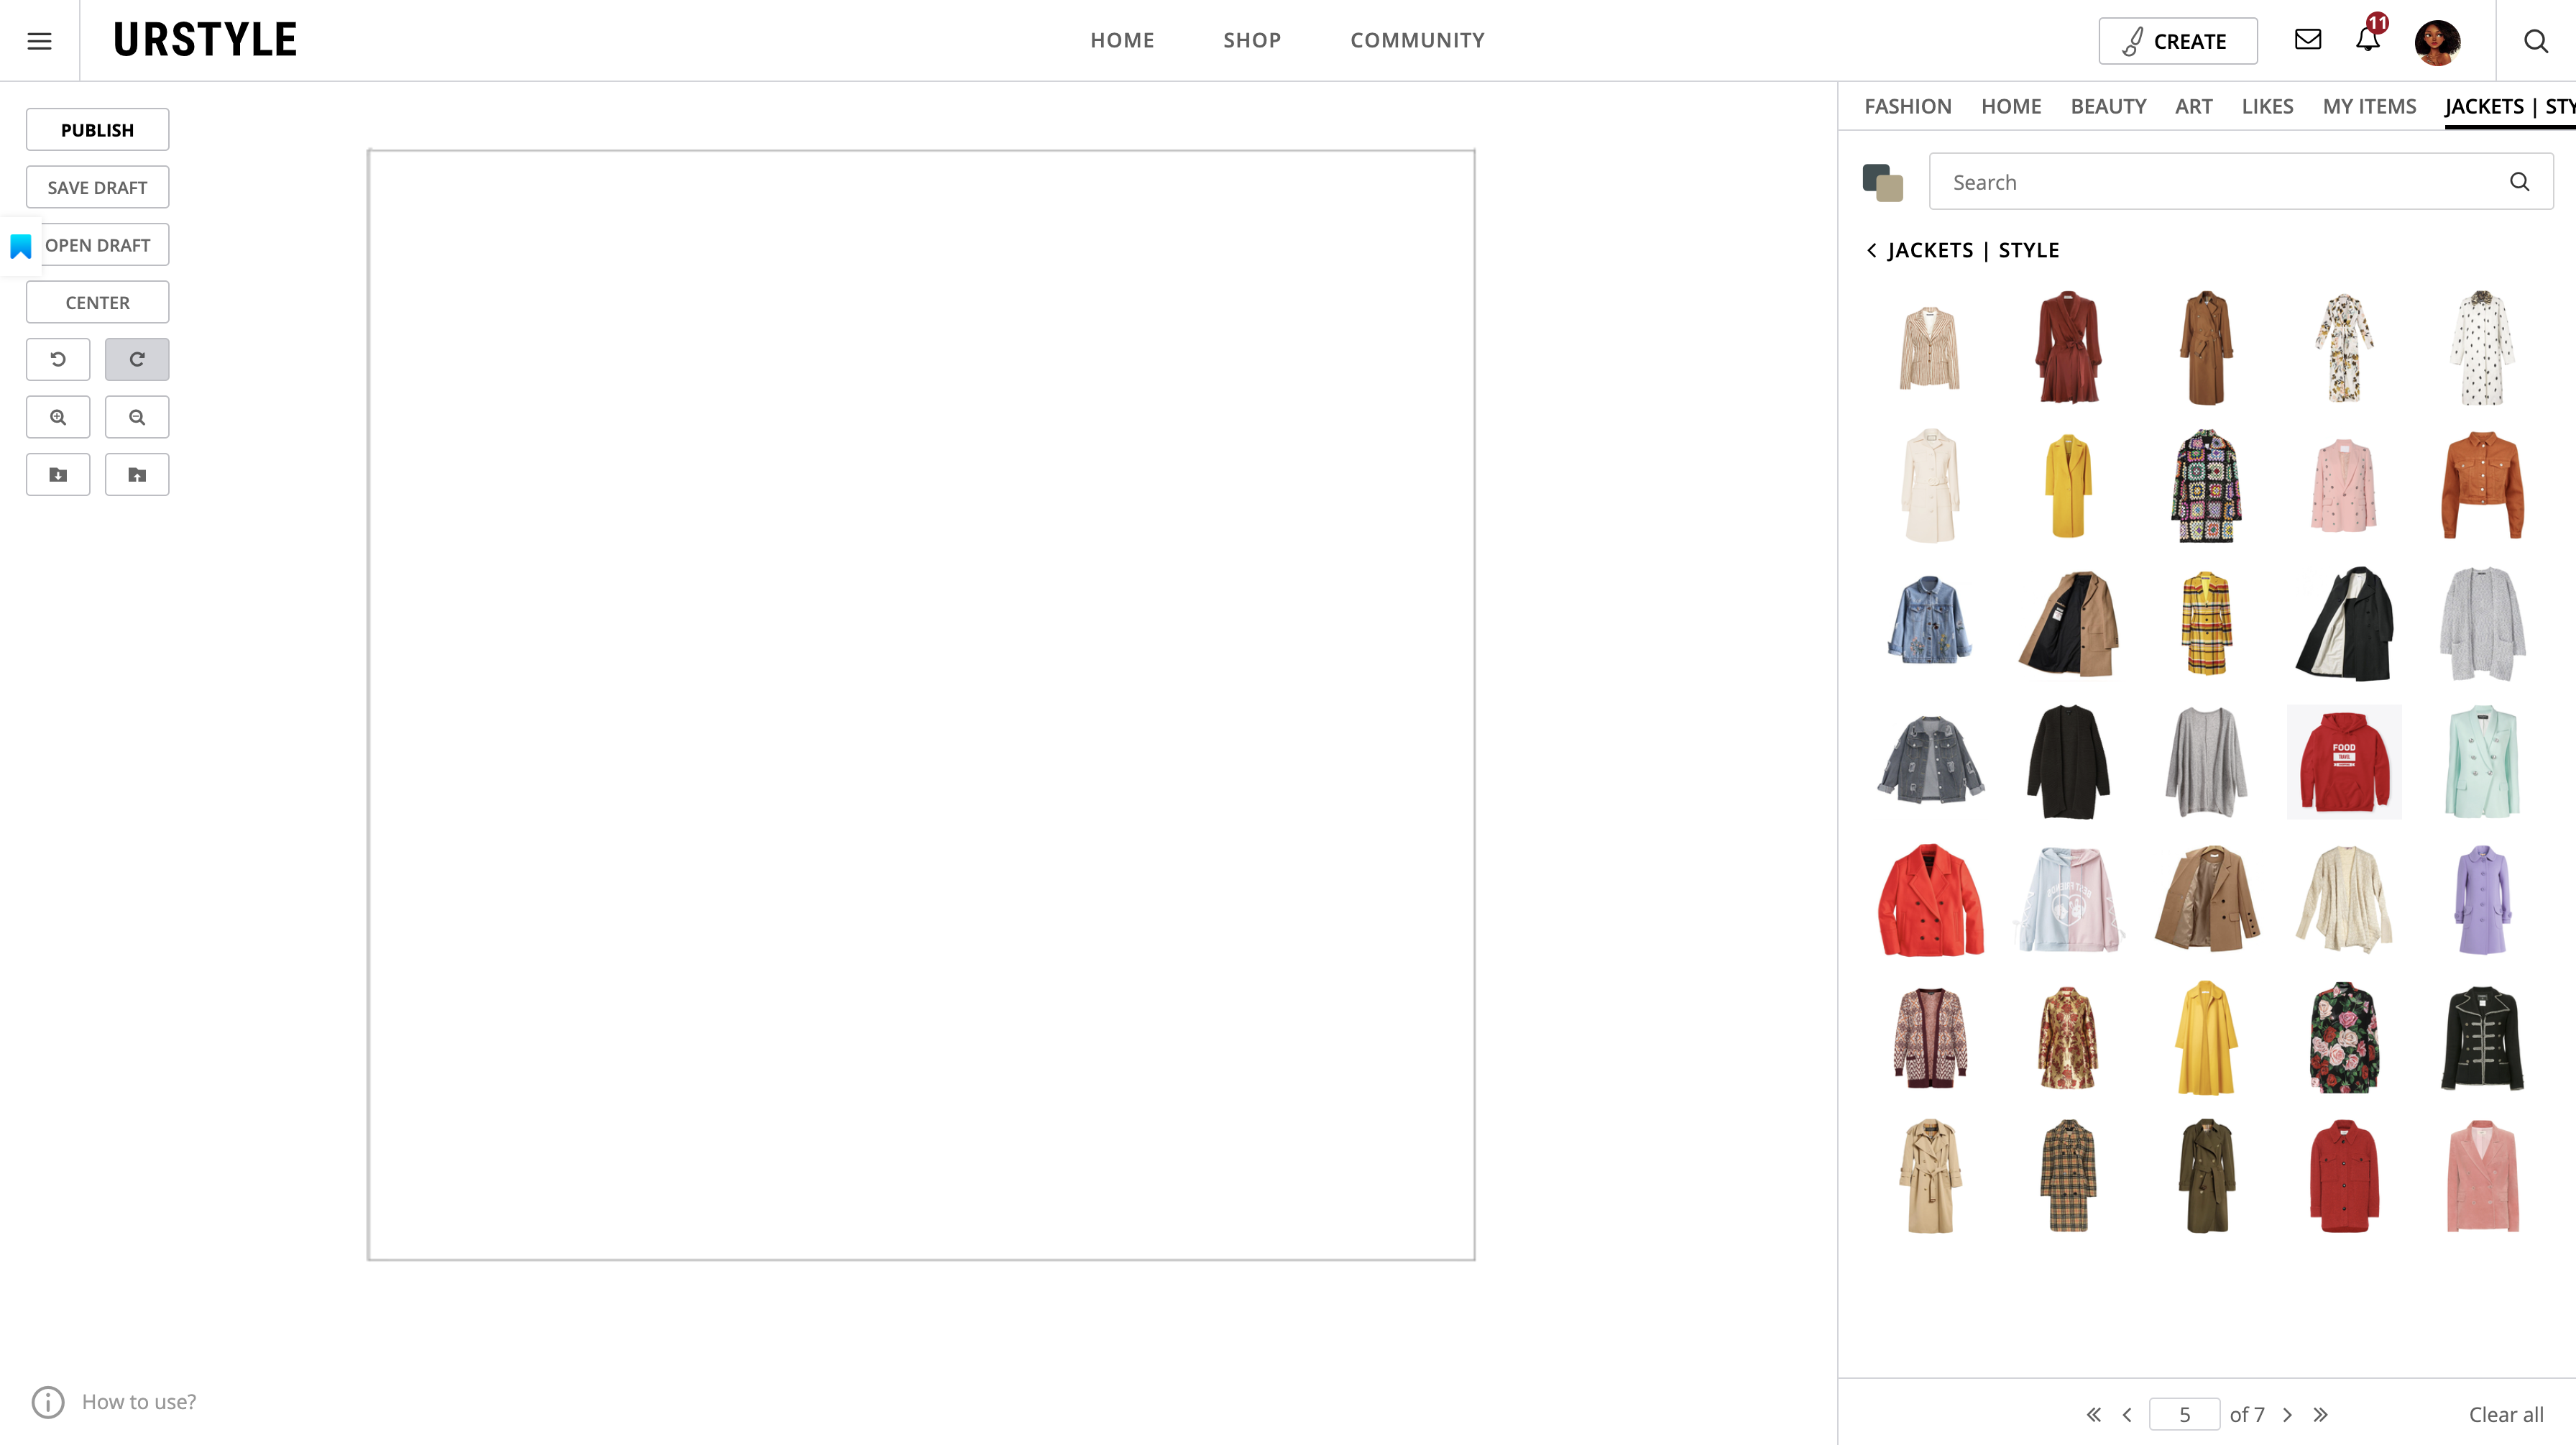
- Then I usually try to find a top, dress, pants and/or jacket to start building my set from. The key thing I keep in mind for my sets is that I try to fill the corners and work my way in, starting with two opposing corners. Depending on the contest, this starting garment changes. Also, I have patterns of pairings that I use. Typically, if I will pair skirts or shorts with tops, dresses with jackets, and pants with tops or jackets. For this contest, the focus is coats, so I picked a bright floral coat that I thought made a statement!
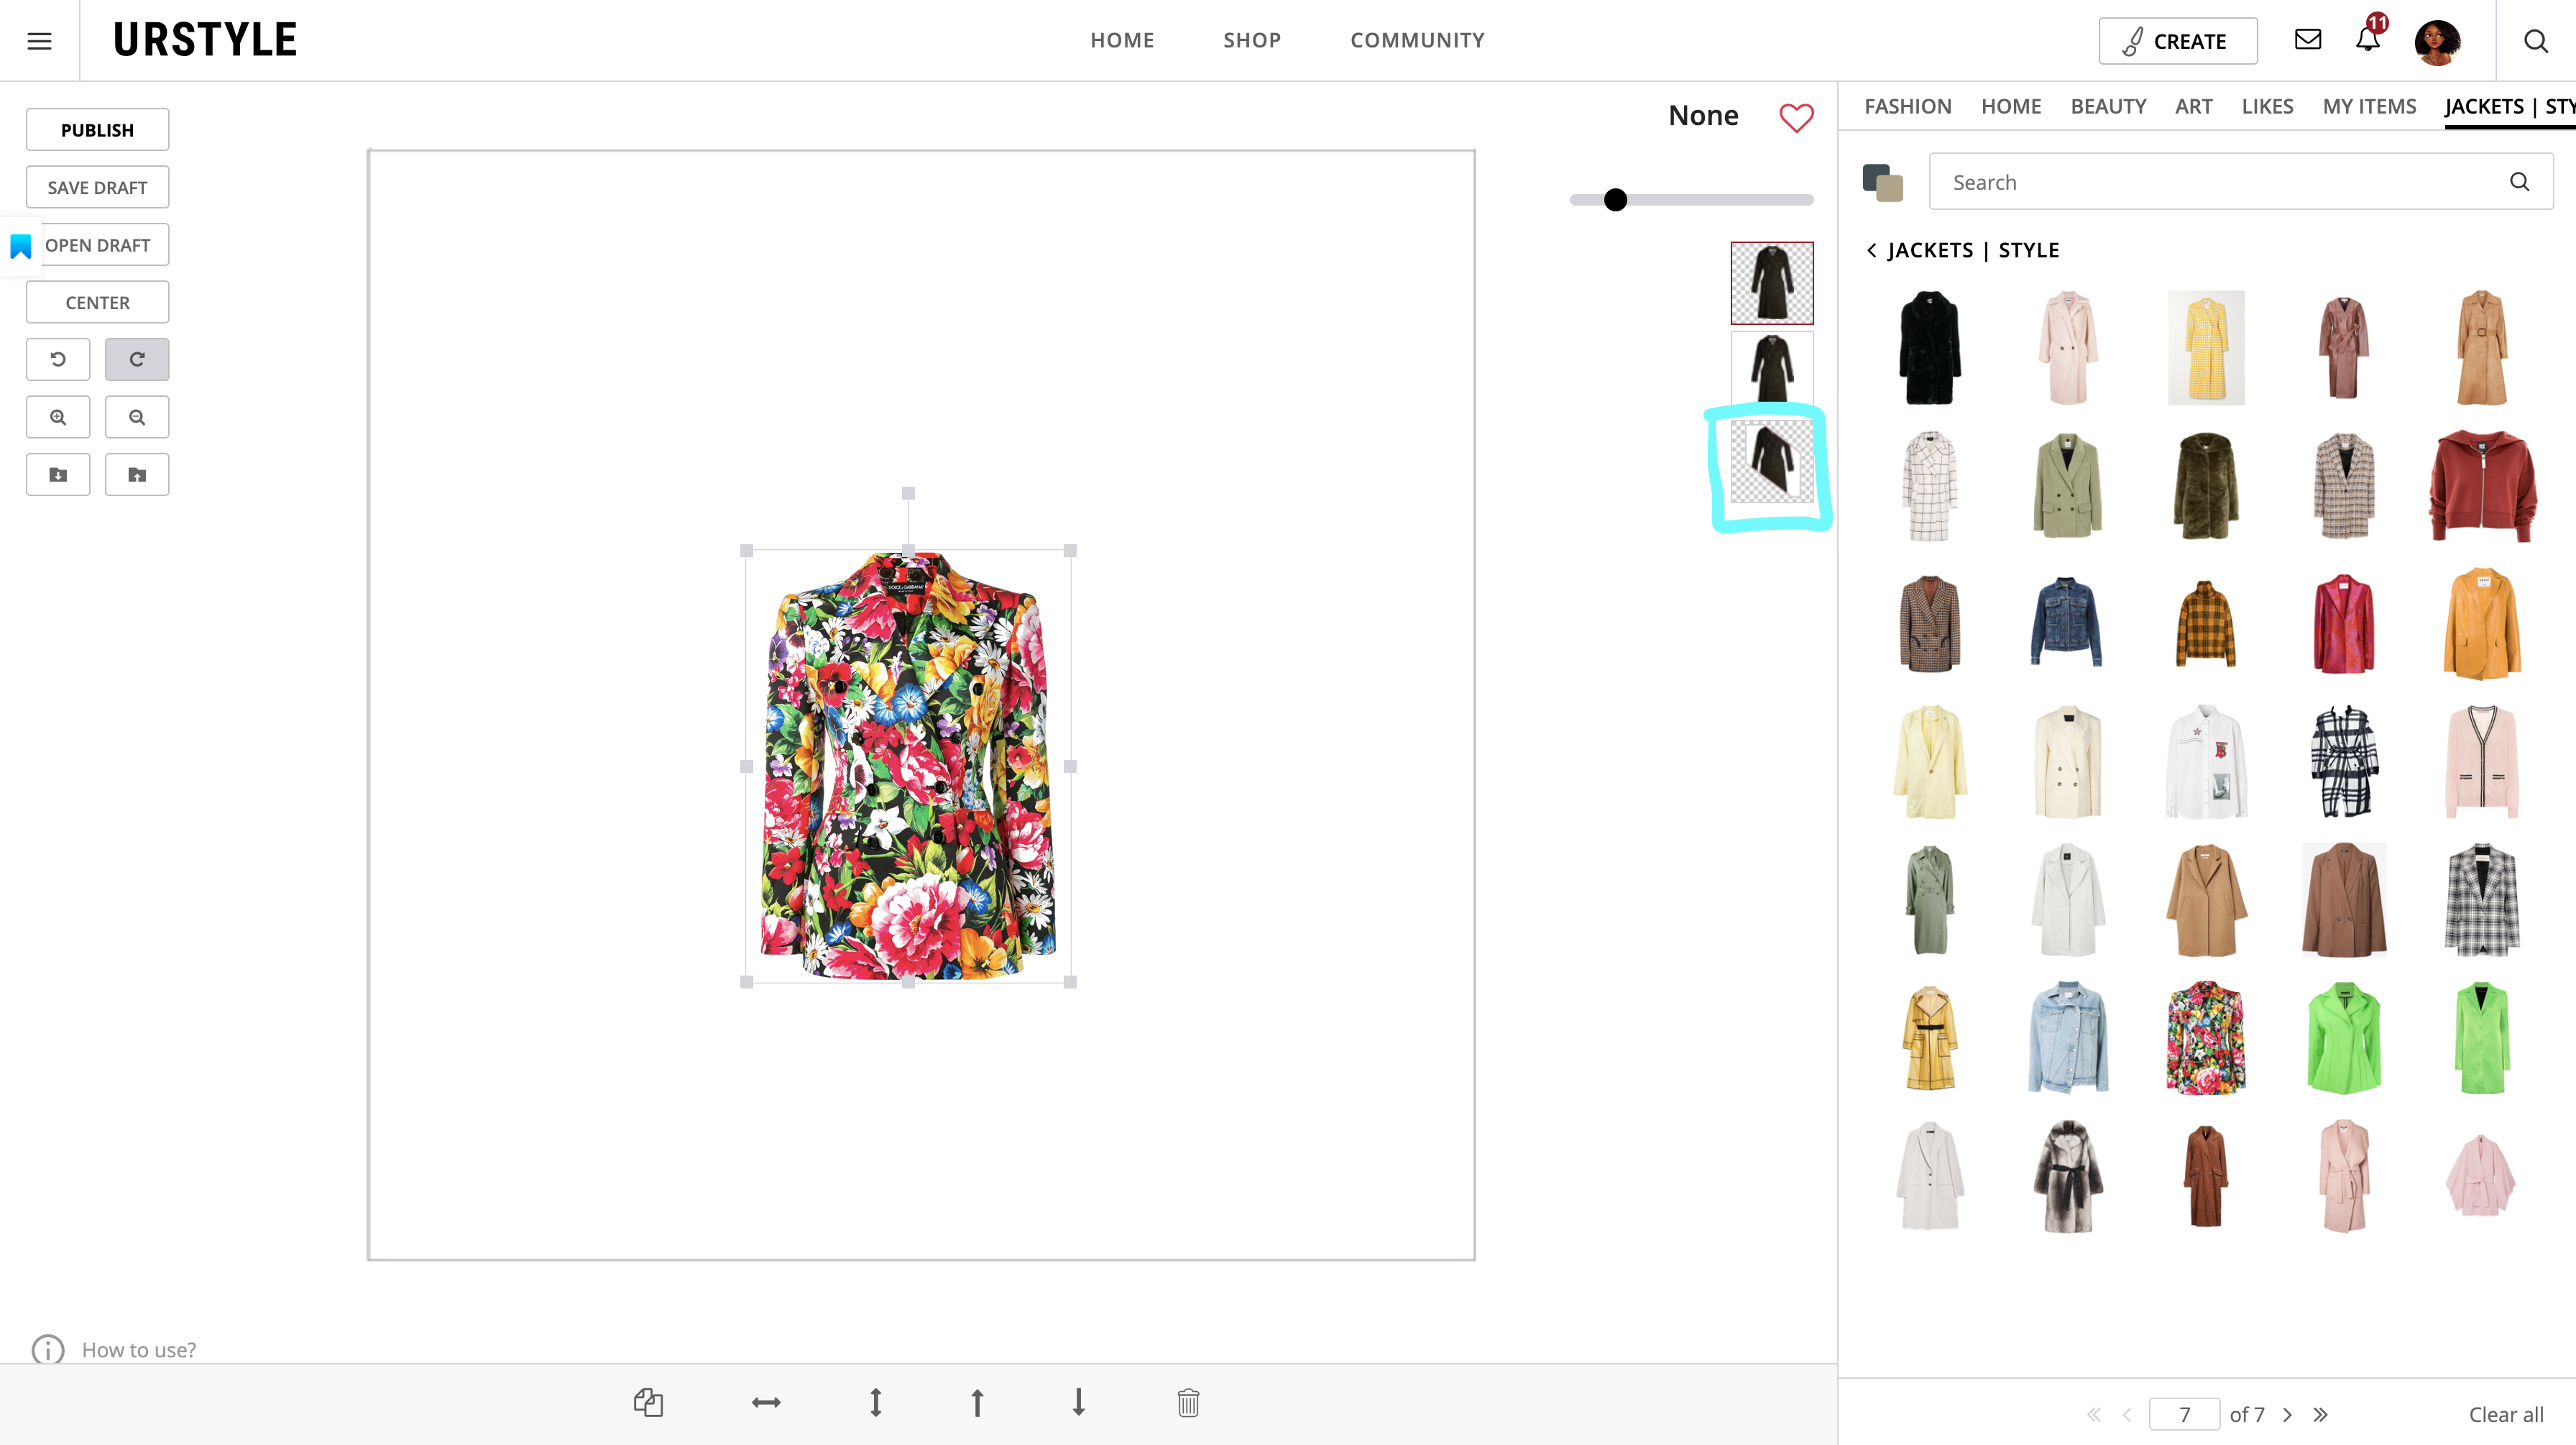
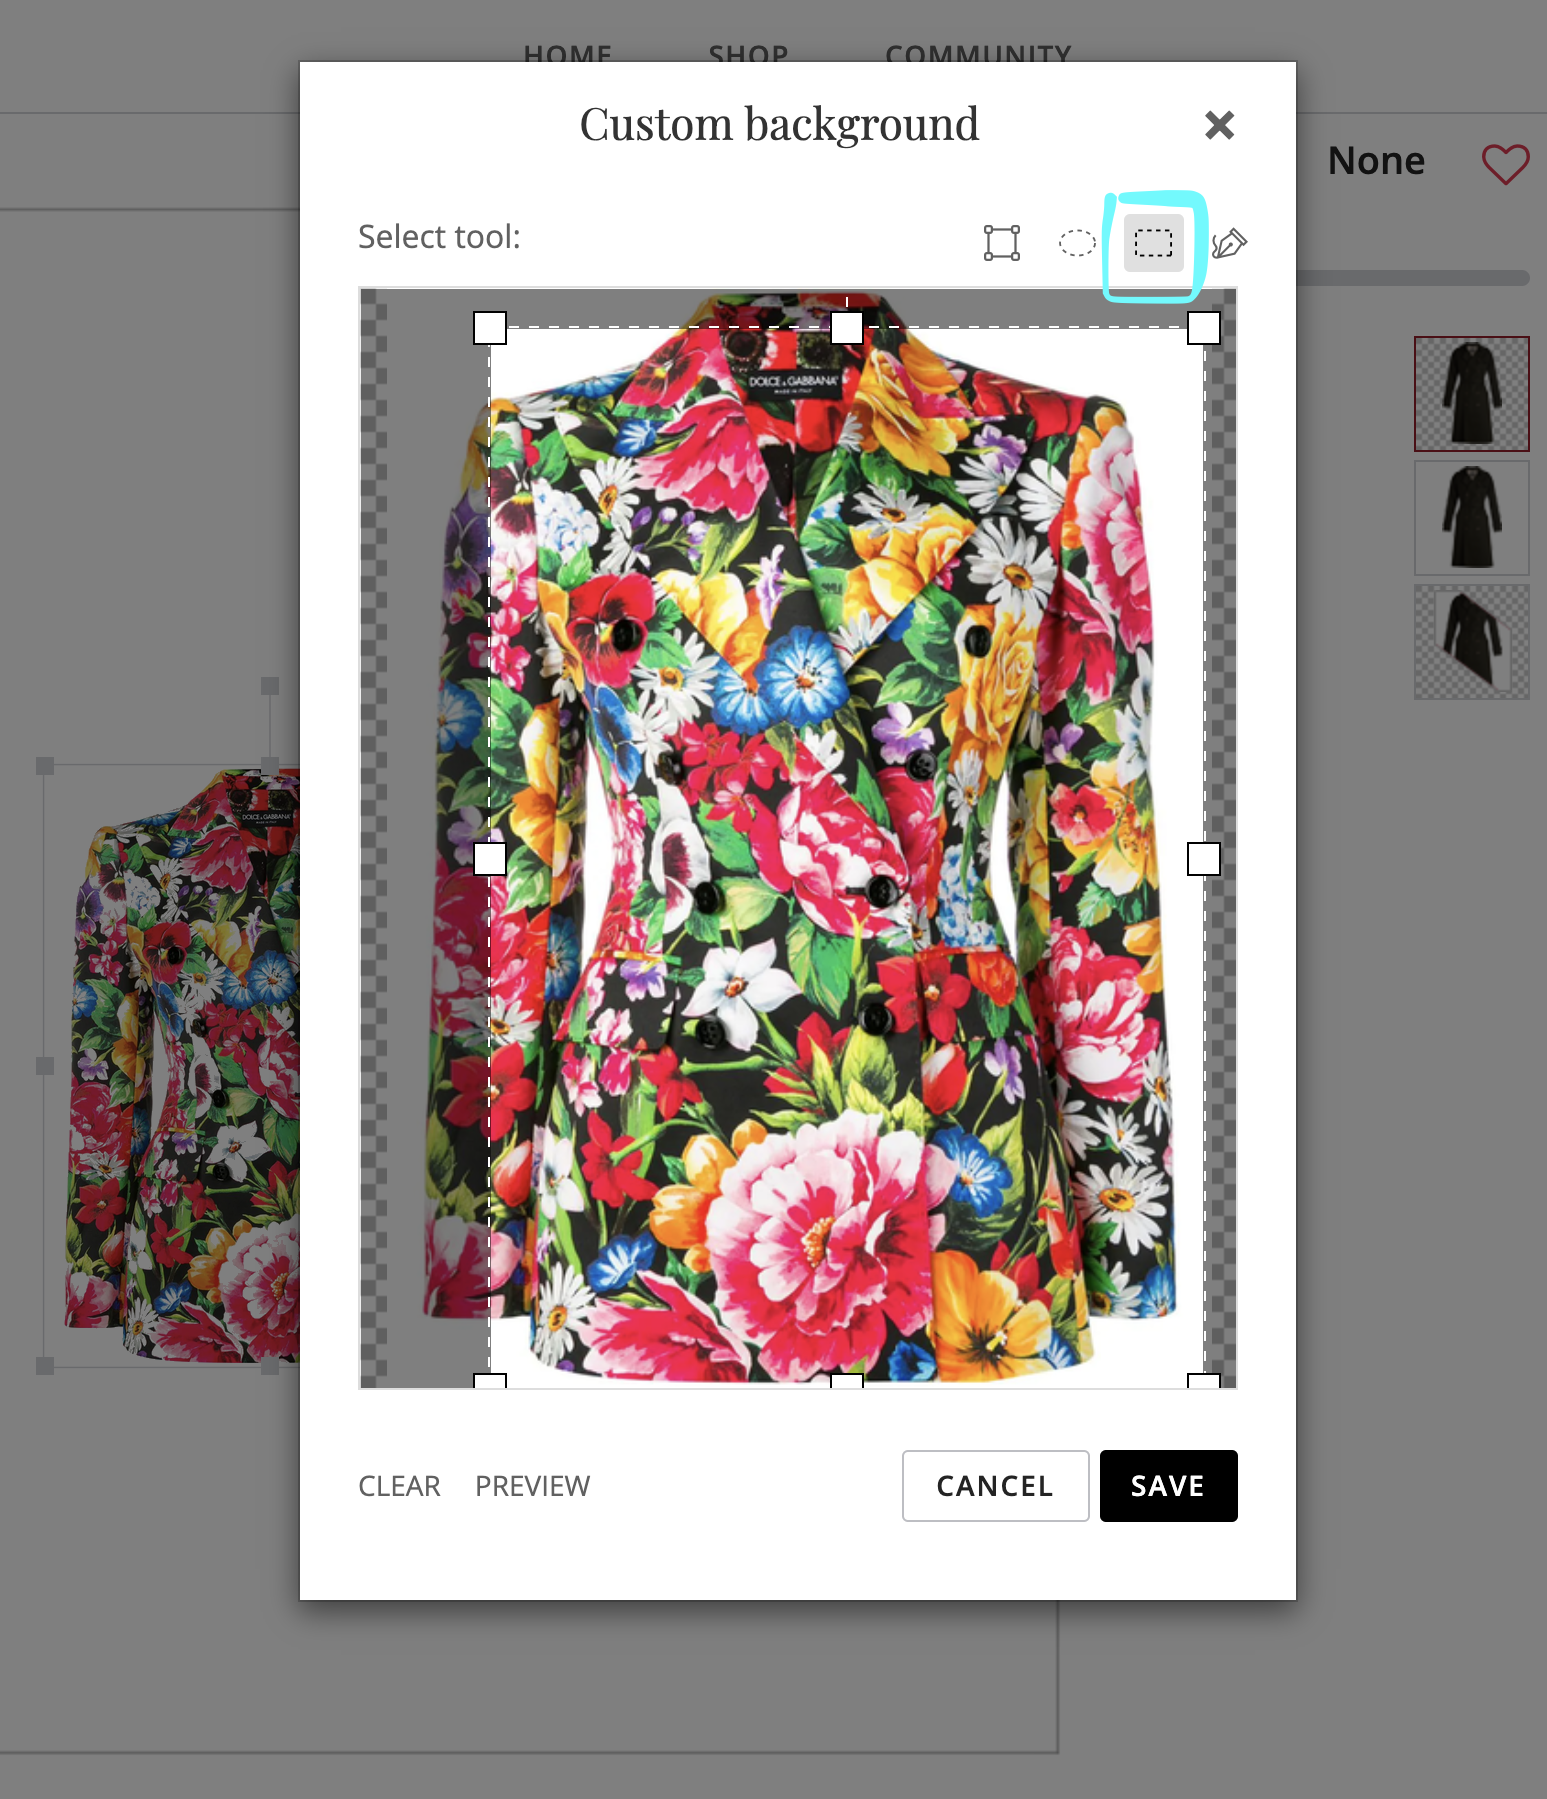
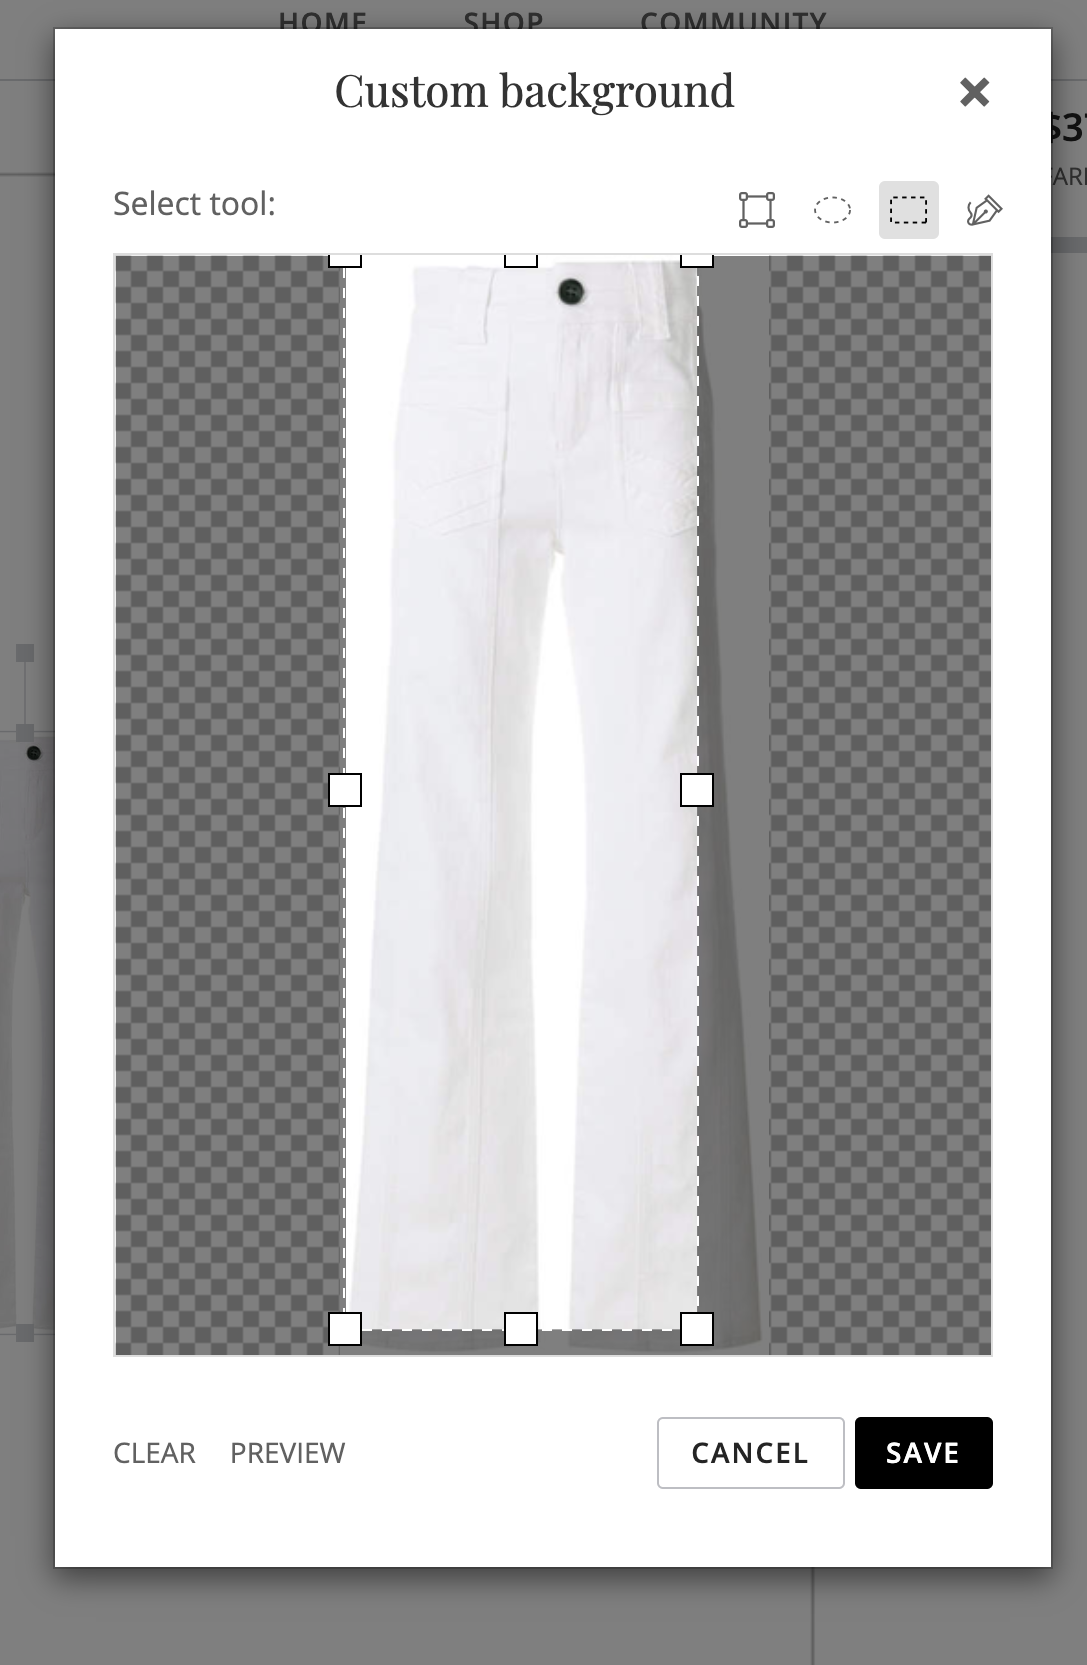
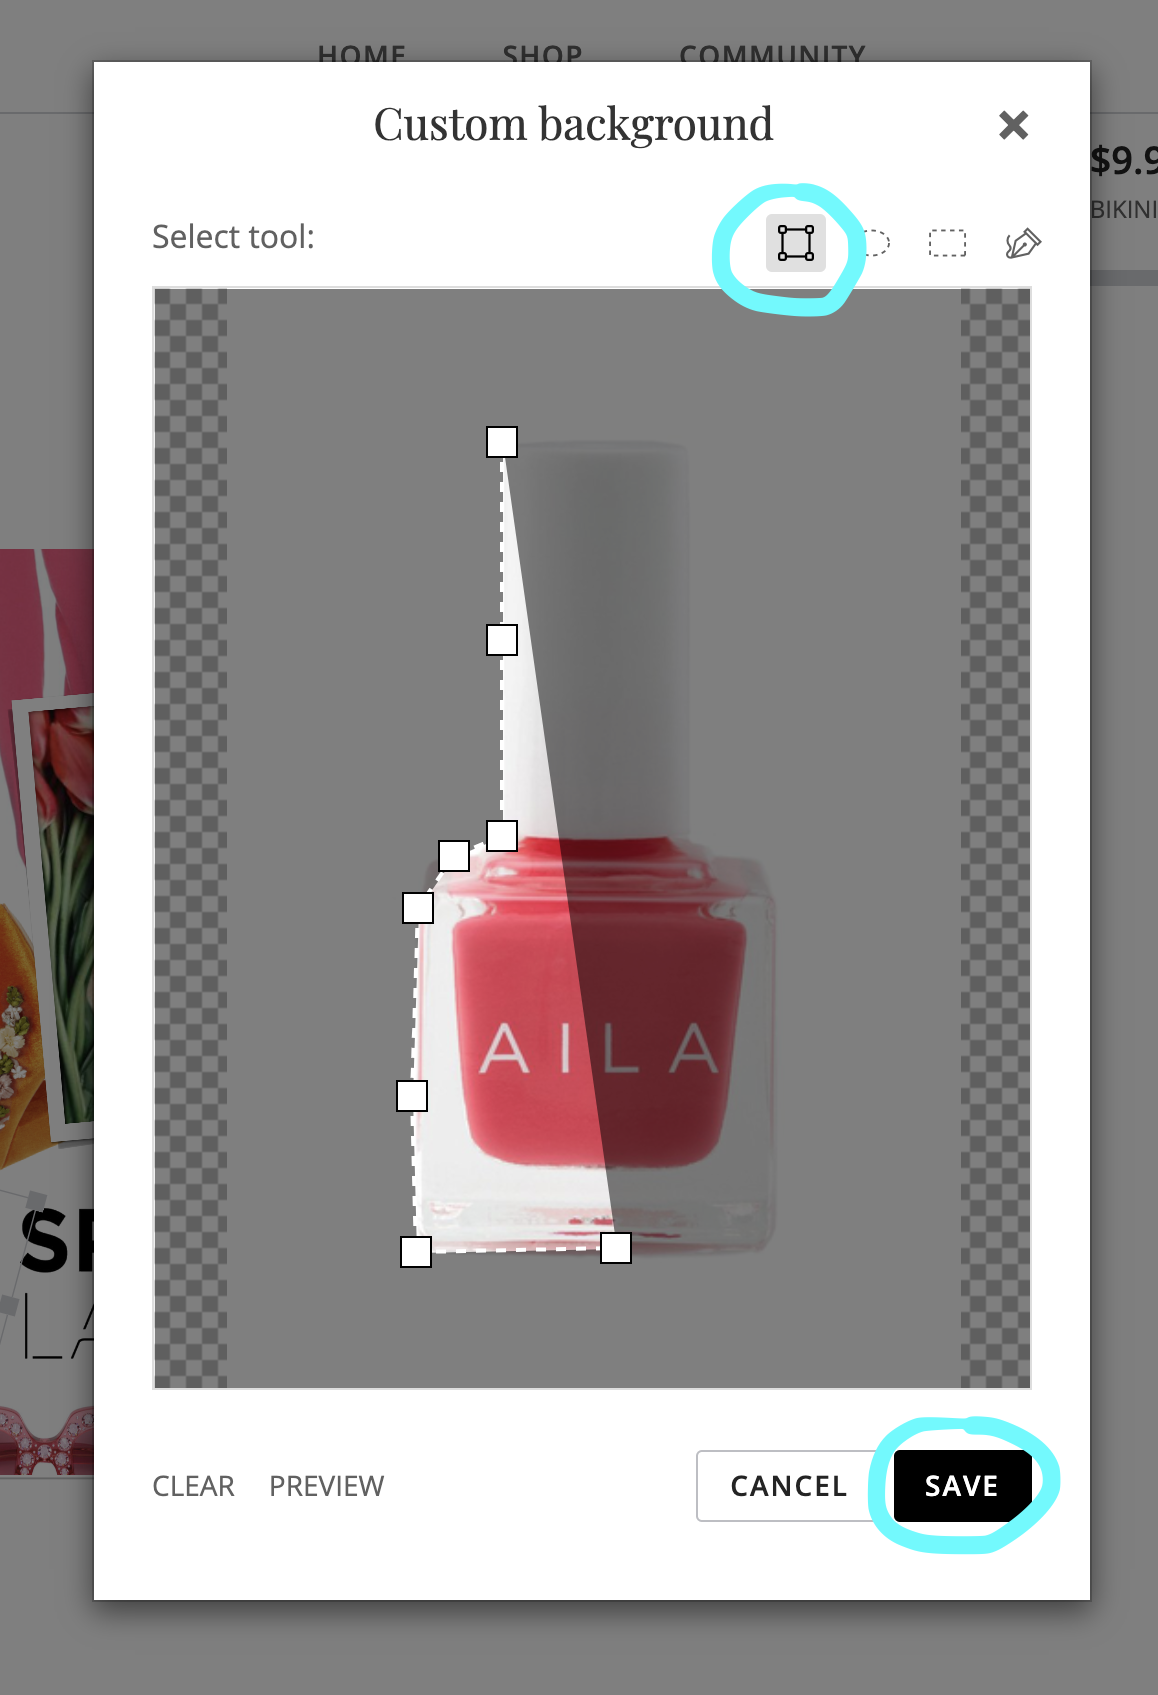
- Next, in order to arrange it into a corner I am going to crop the item by selecting the button highlighted in blue above. It is important that you are actively selecting the item or else the three boxes on the right won't show up! When you click on the box, a menu should show up. Then I select the rectangular selection tool at the top and hold + drag the a box over what I want to be selected. KEEP IN MIND: Everything in white and not shaded is what will remain after you save it. If the whole thing is shaded when you drag over your item, it will be invisible when you save it. If that happens or you make any other mistakes, hit clear at the bottom left and try again! Since I am planning on putting this jacket in the upper left corner of my set, I set my selection so that it cuts off the item in that corner and hit save.
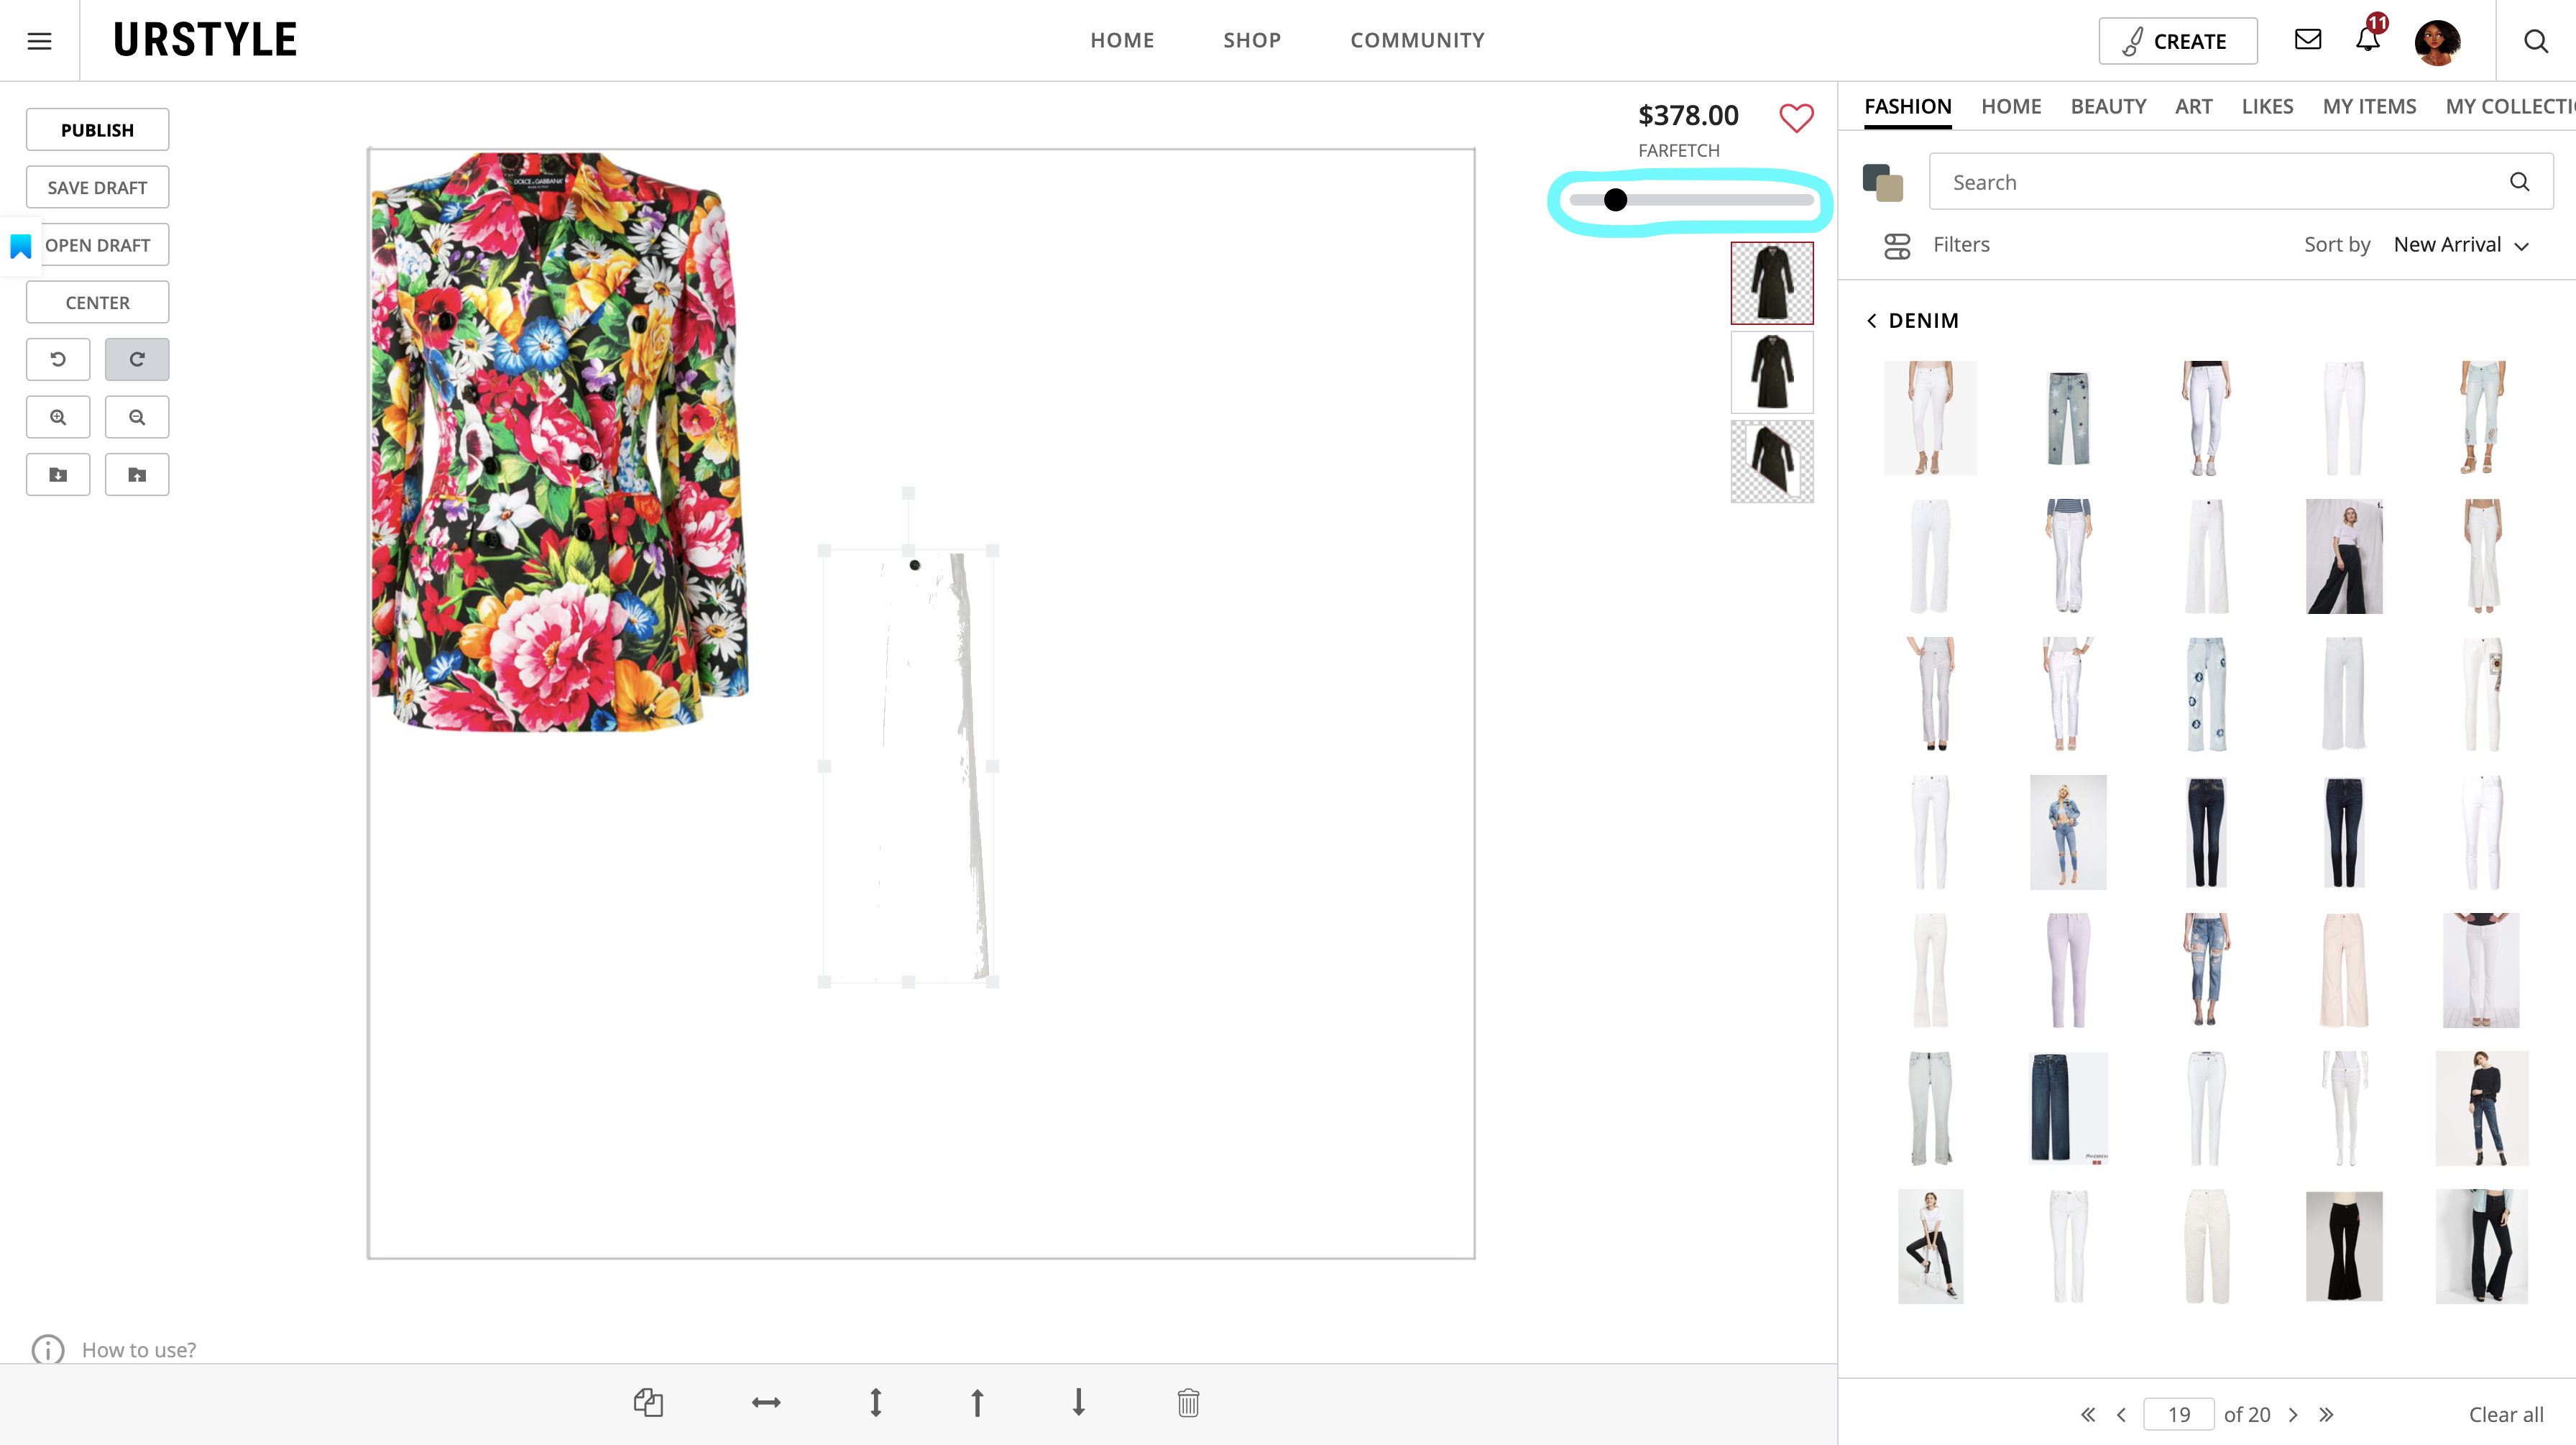
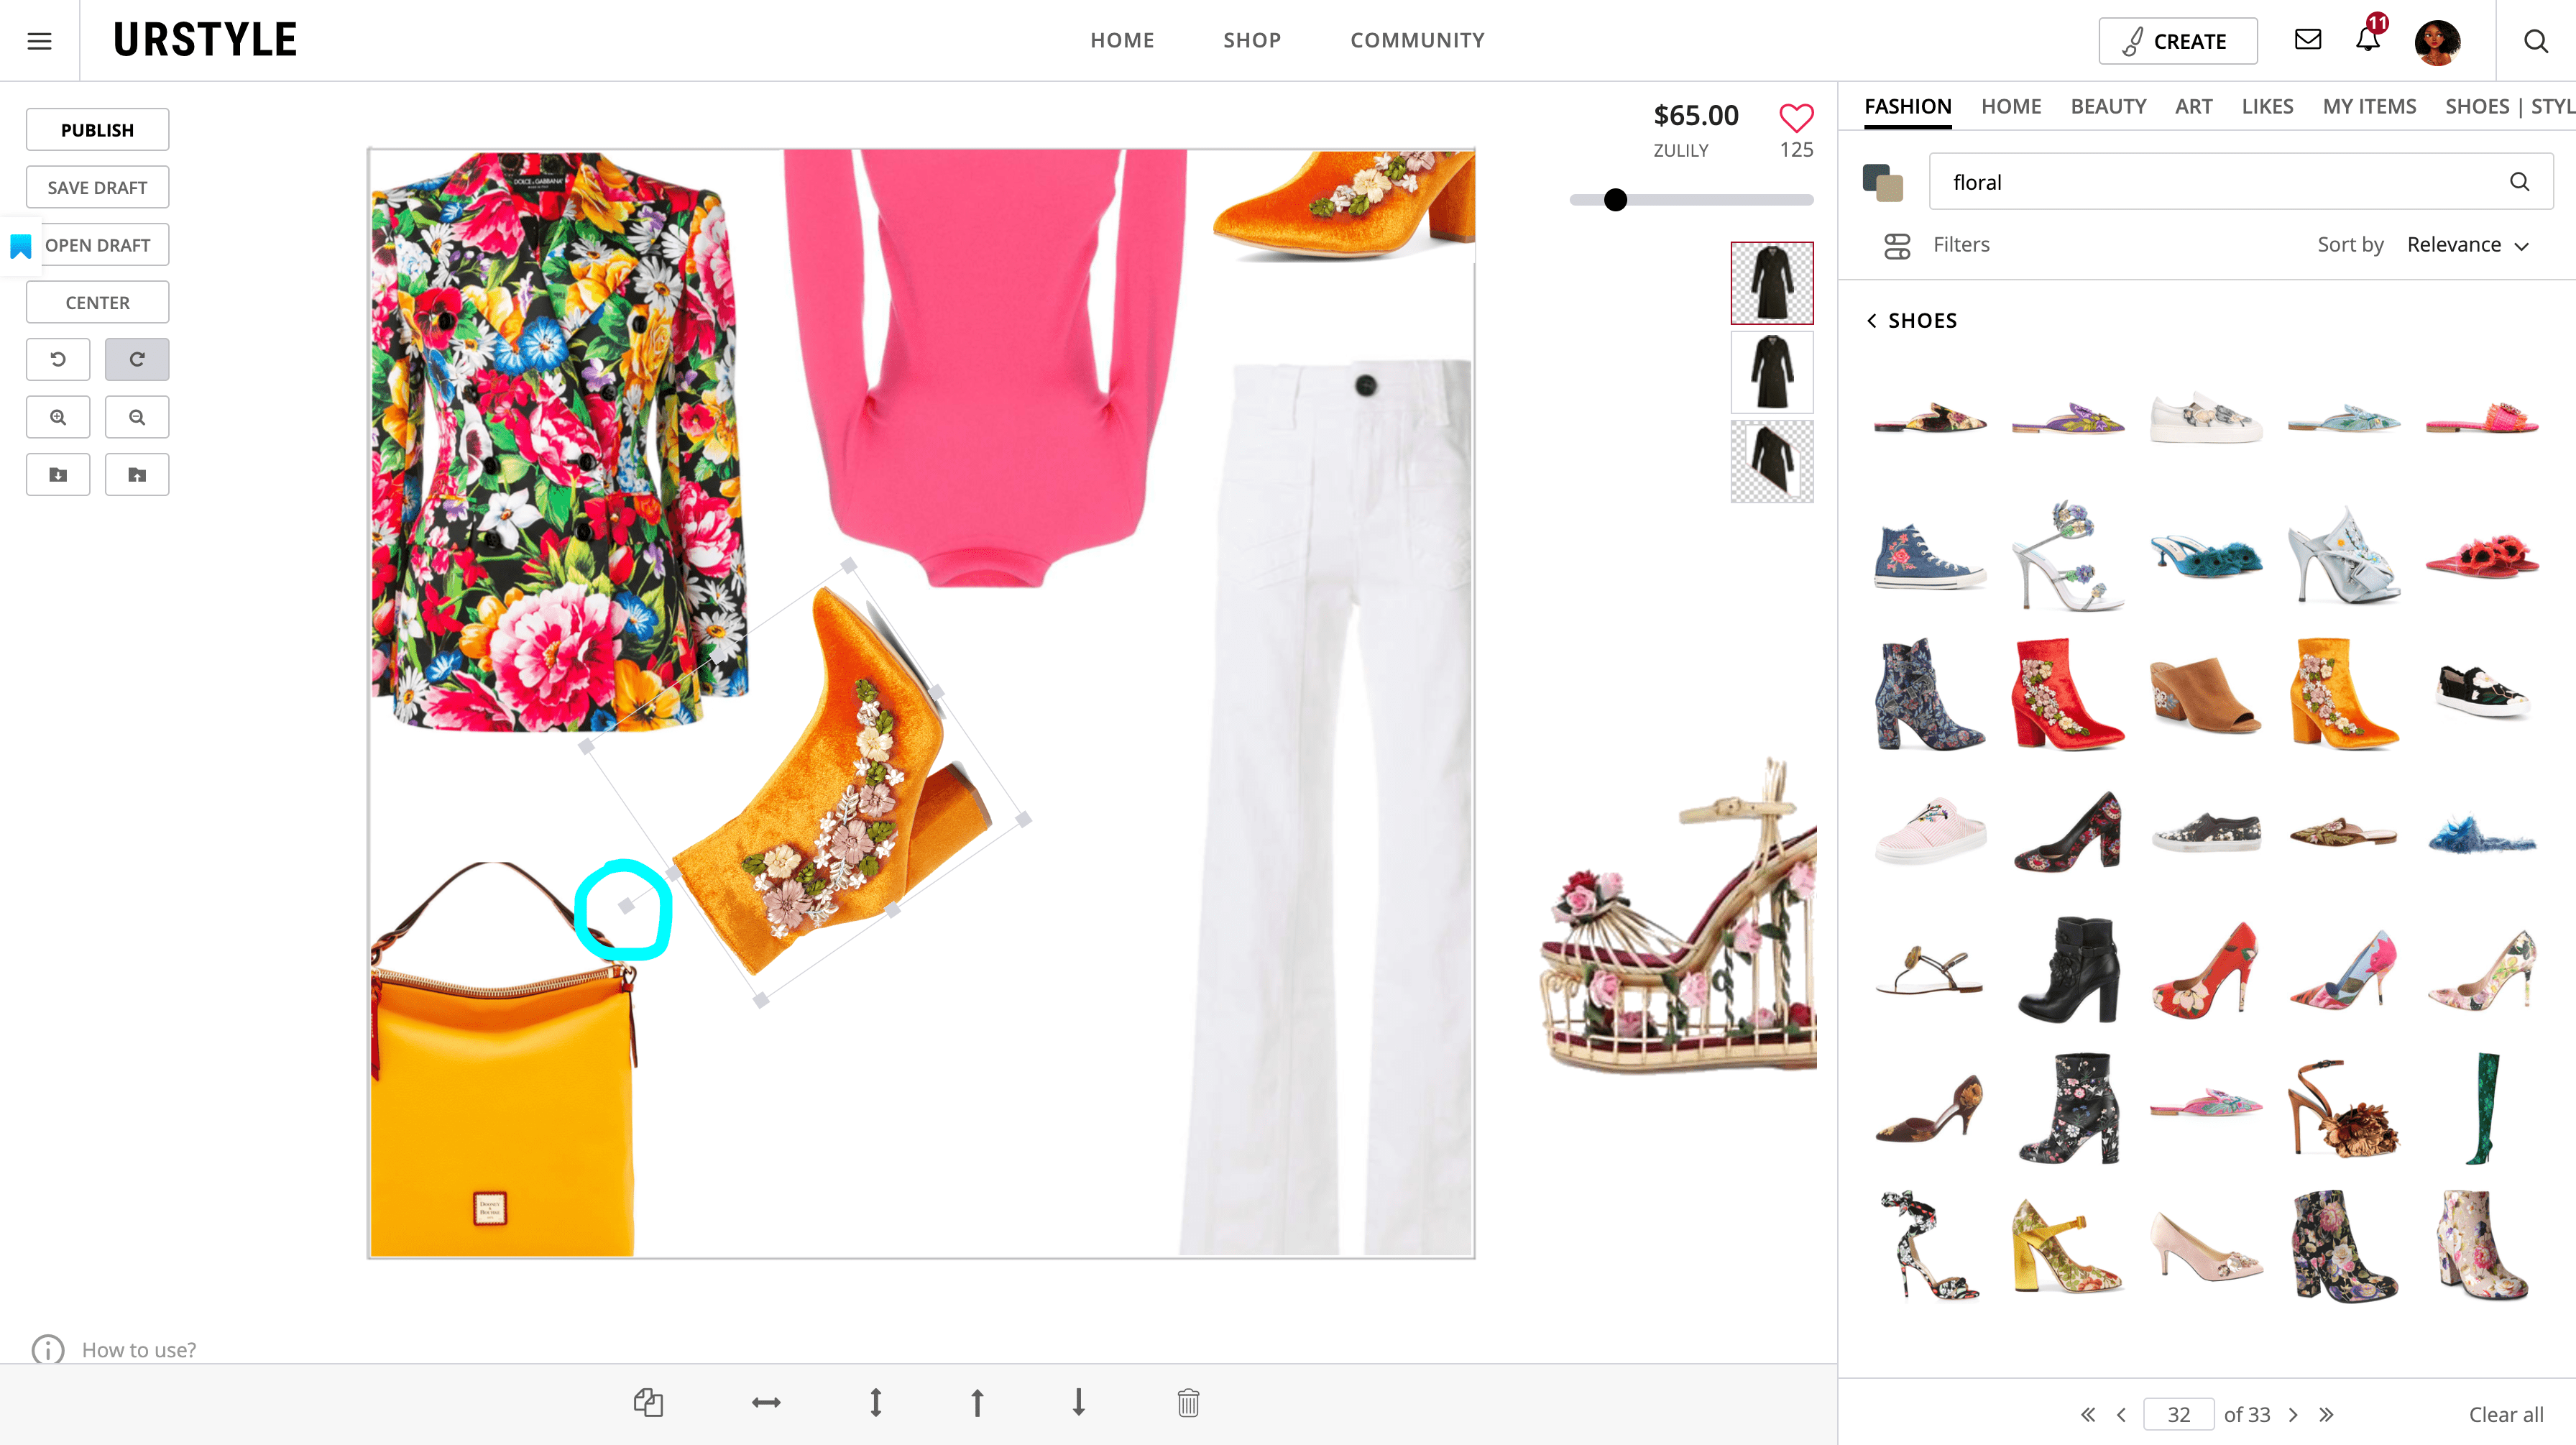
- Then, I just move my new manipulated item into the corresponding corner. If I don't like the corner or want to move something, it is as easy going back into the menu and shifting my selection so the "cut-off" is in a different corner. After that I added some white jeans (since I am planning on entering this set into the white jeans contest), however they are nearly invisible in the image below. When that happens, I use the transparency bar (circled in blue) and drag the circle further left. (Tip: further left = more opaque, further right = more transparent)
- I will then do the same process I did to the jacket to the jeans but arrange the cutoff so it can be arranged in the opposite corner!
- After that, I will find shoes and bags to fill the other corners and/or take up more space in the set repeating the same cutoff process as before. At this point I can also see what the color scheme is for this set and choose items accordingly. For this set, I used the color scheme of the jacket and since I am entering it into the Floral Combinations contest, I wanted my accessories to be floral and bright as well. For the shoes, I used the tiny dot circled in blue to rotate my shoes so it best fit the space left by the jacket and bag.
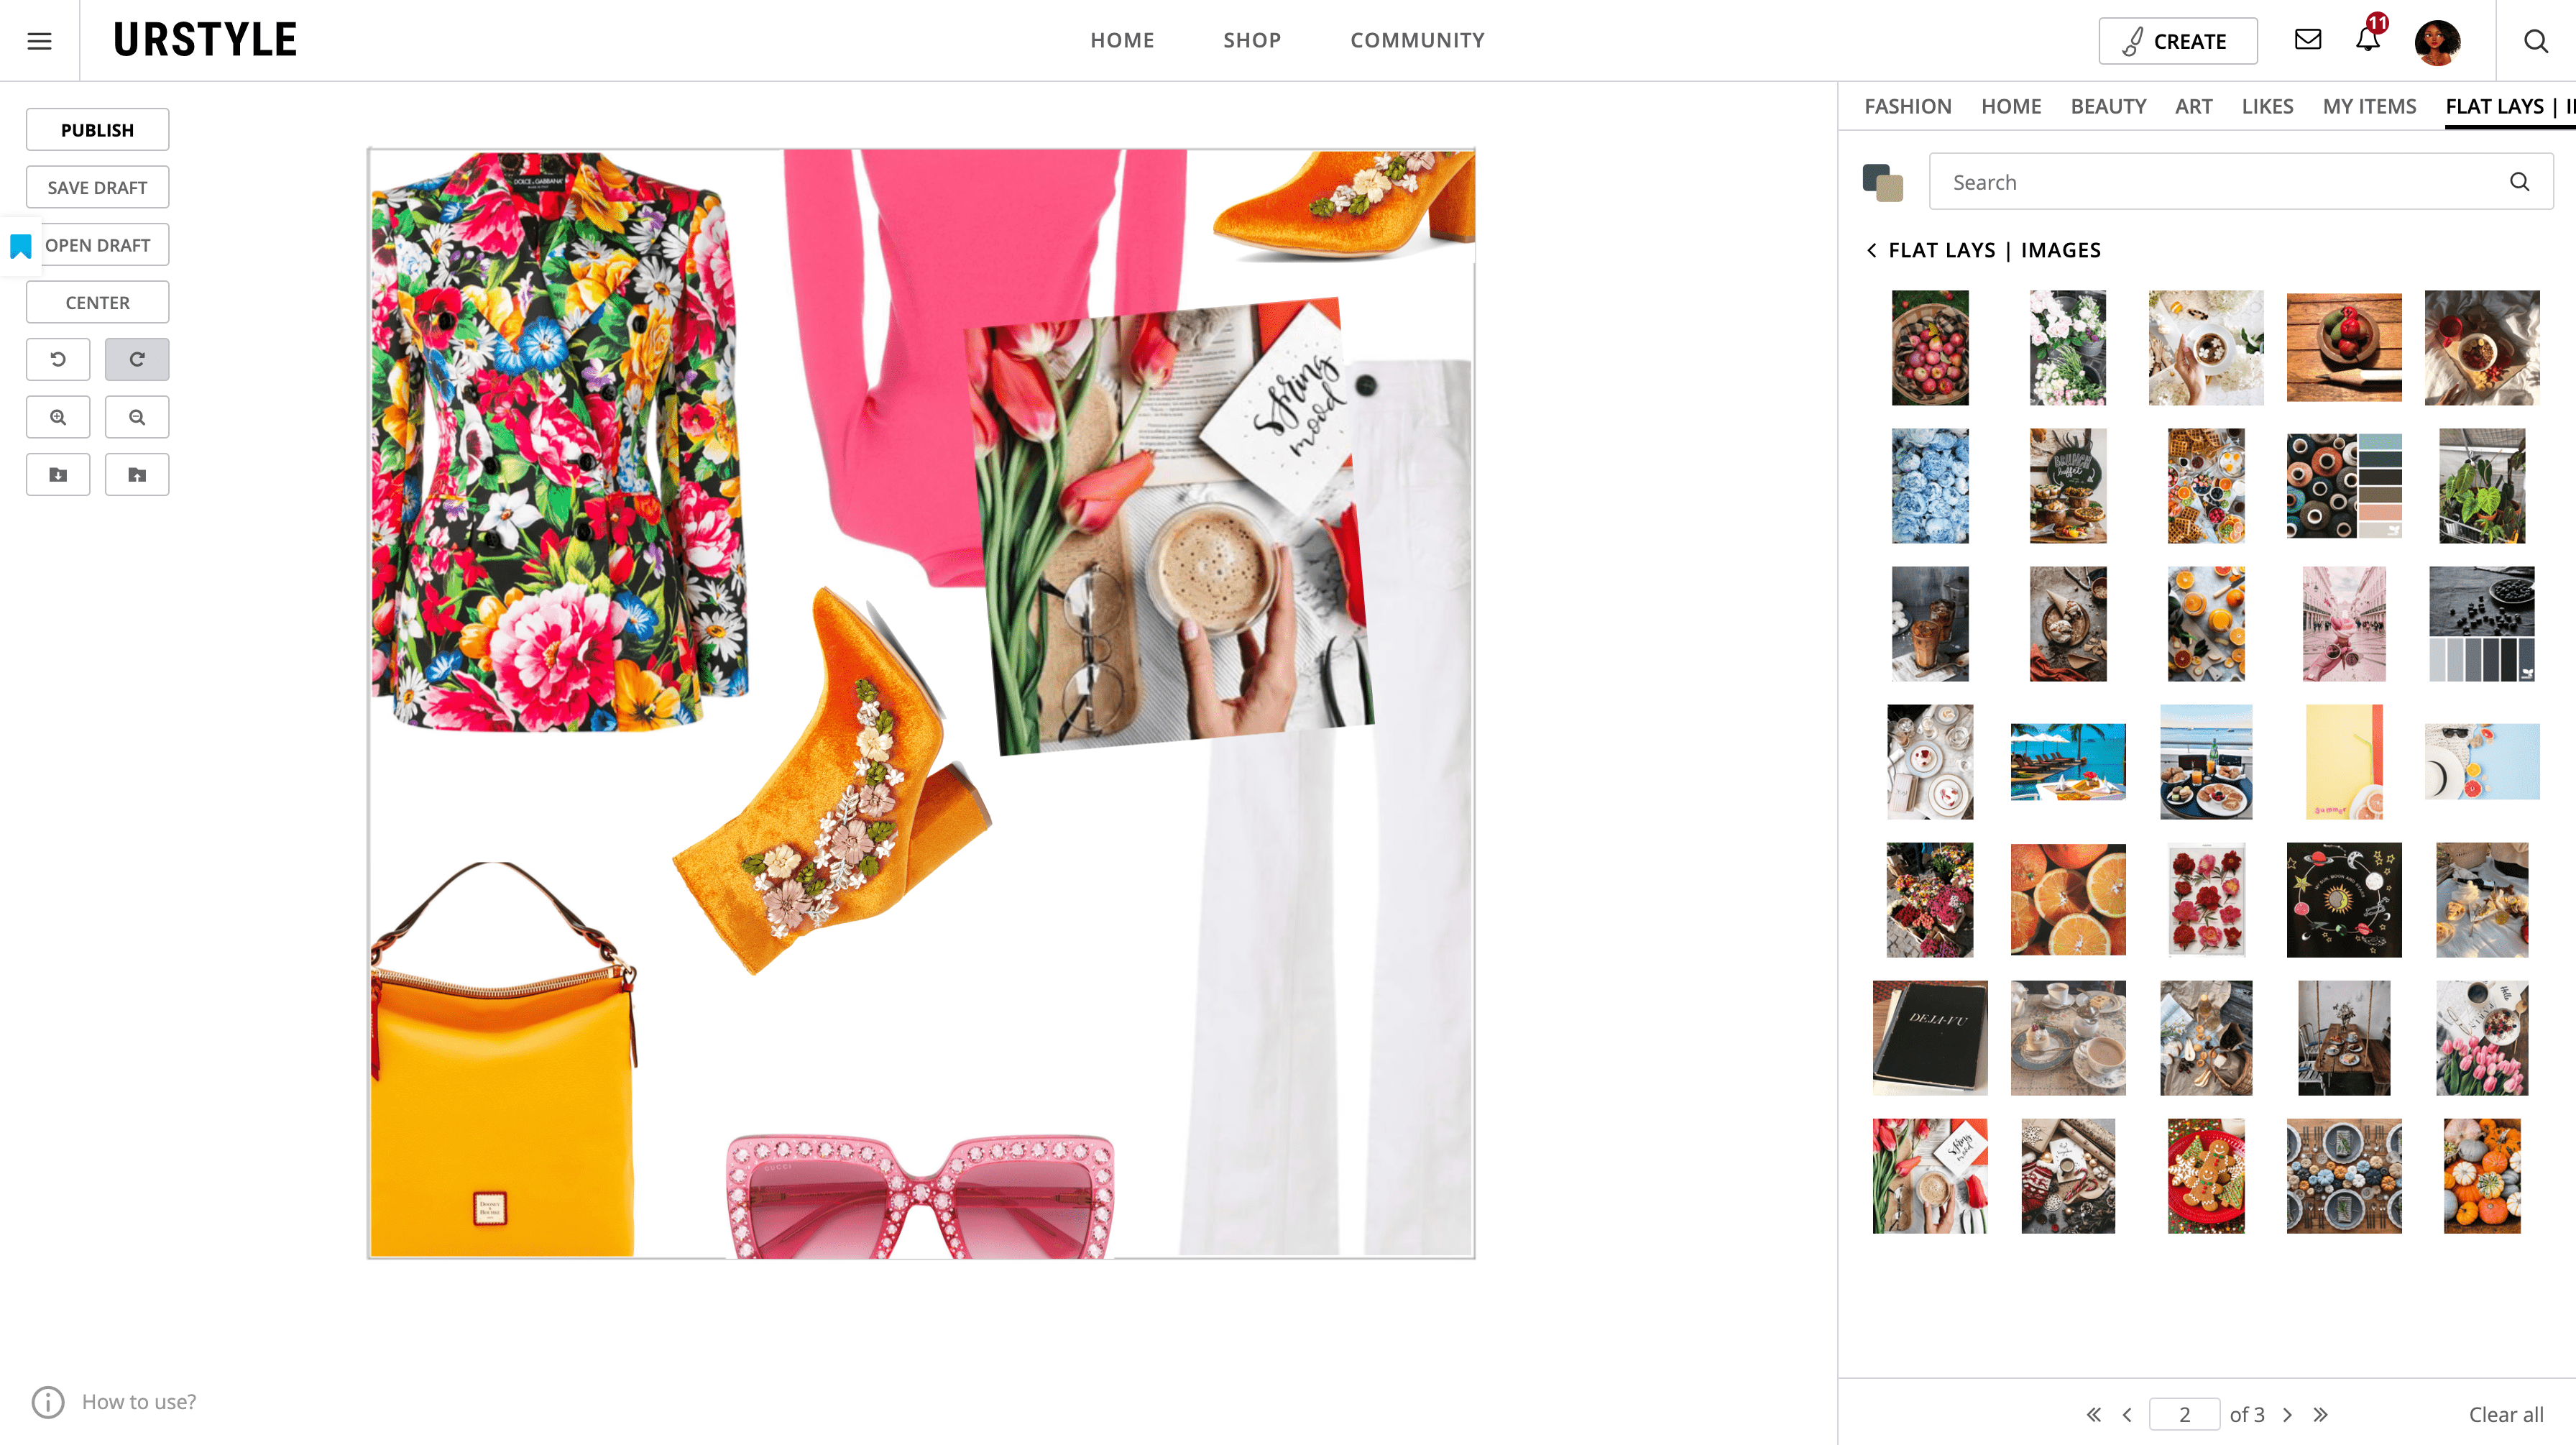
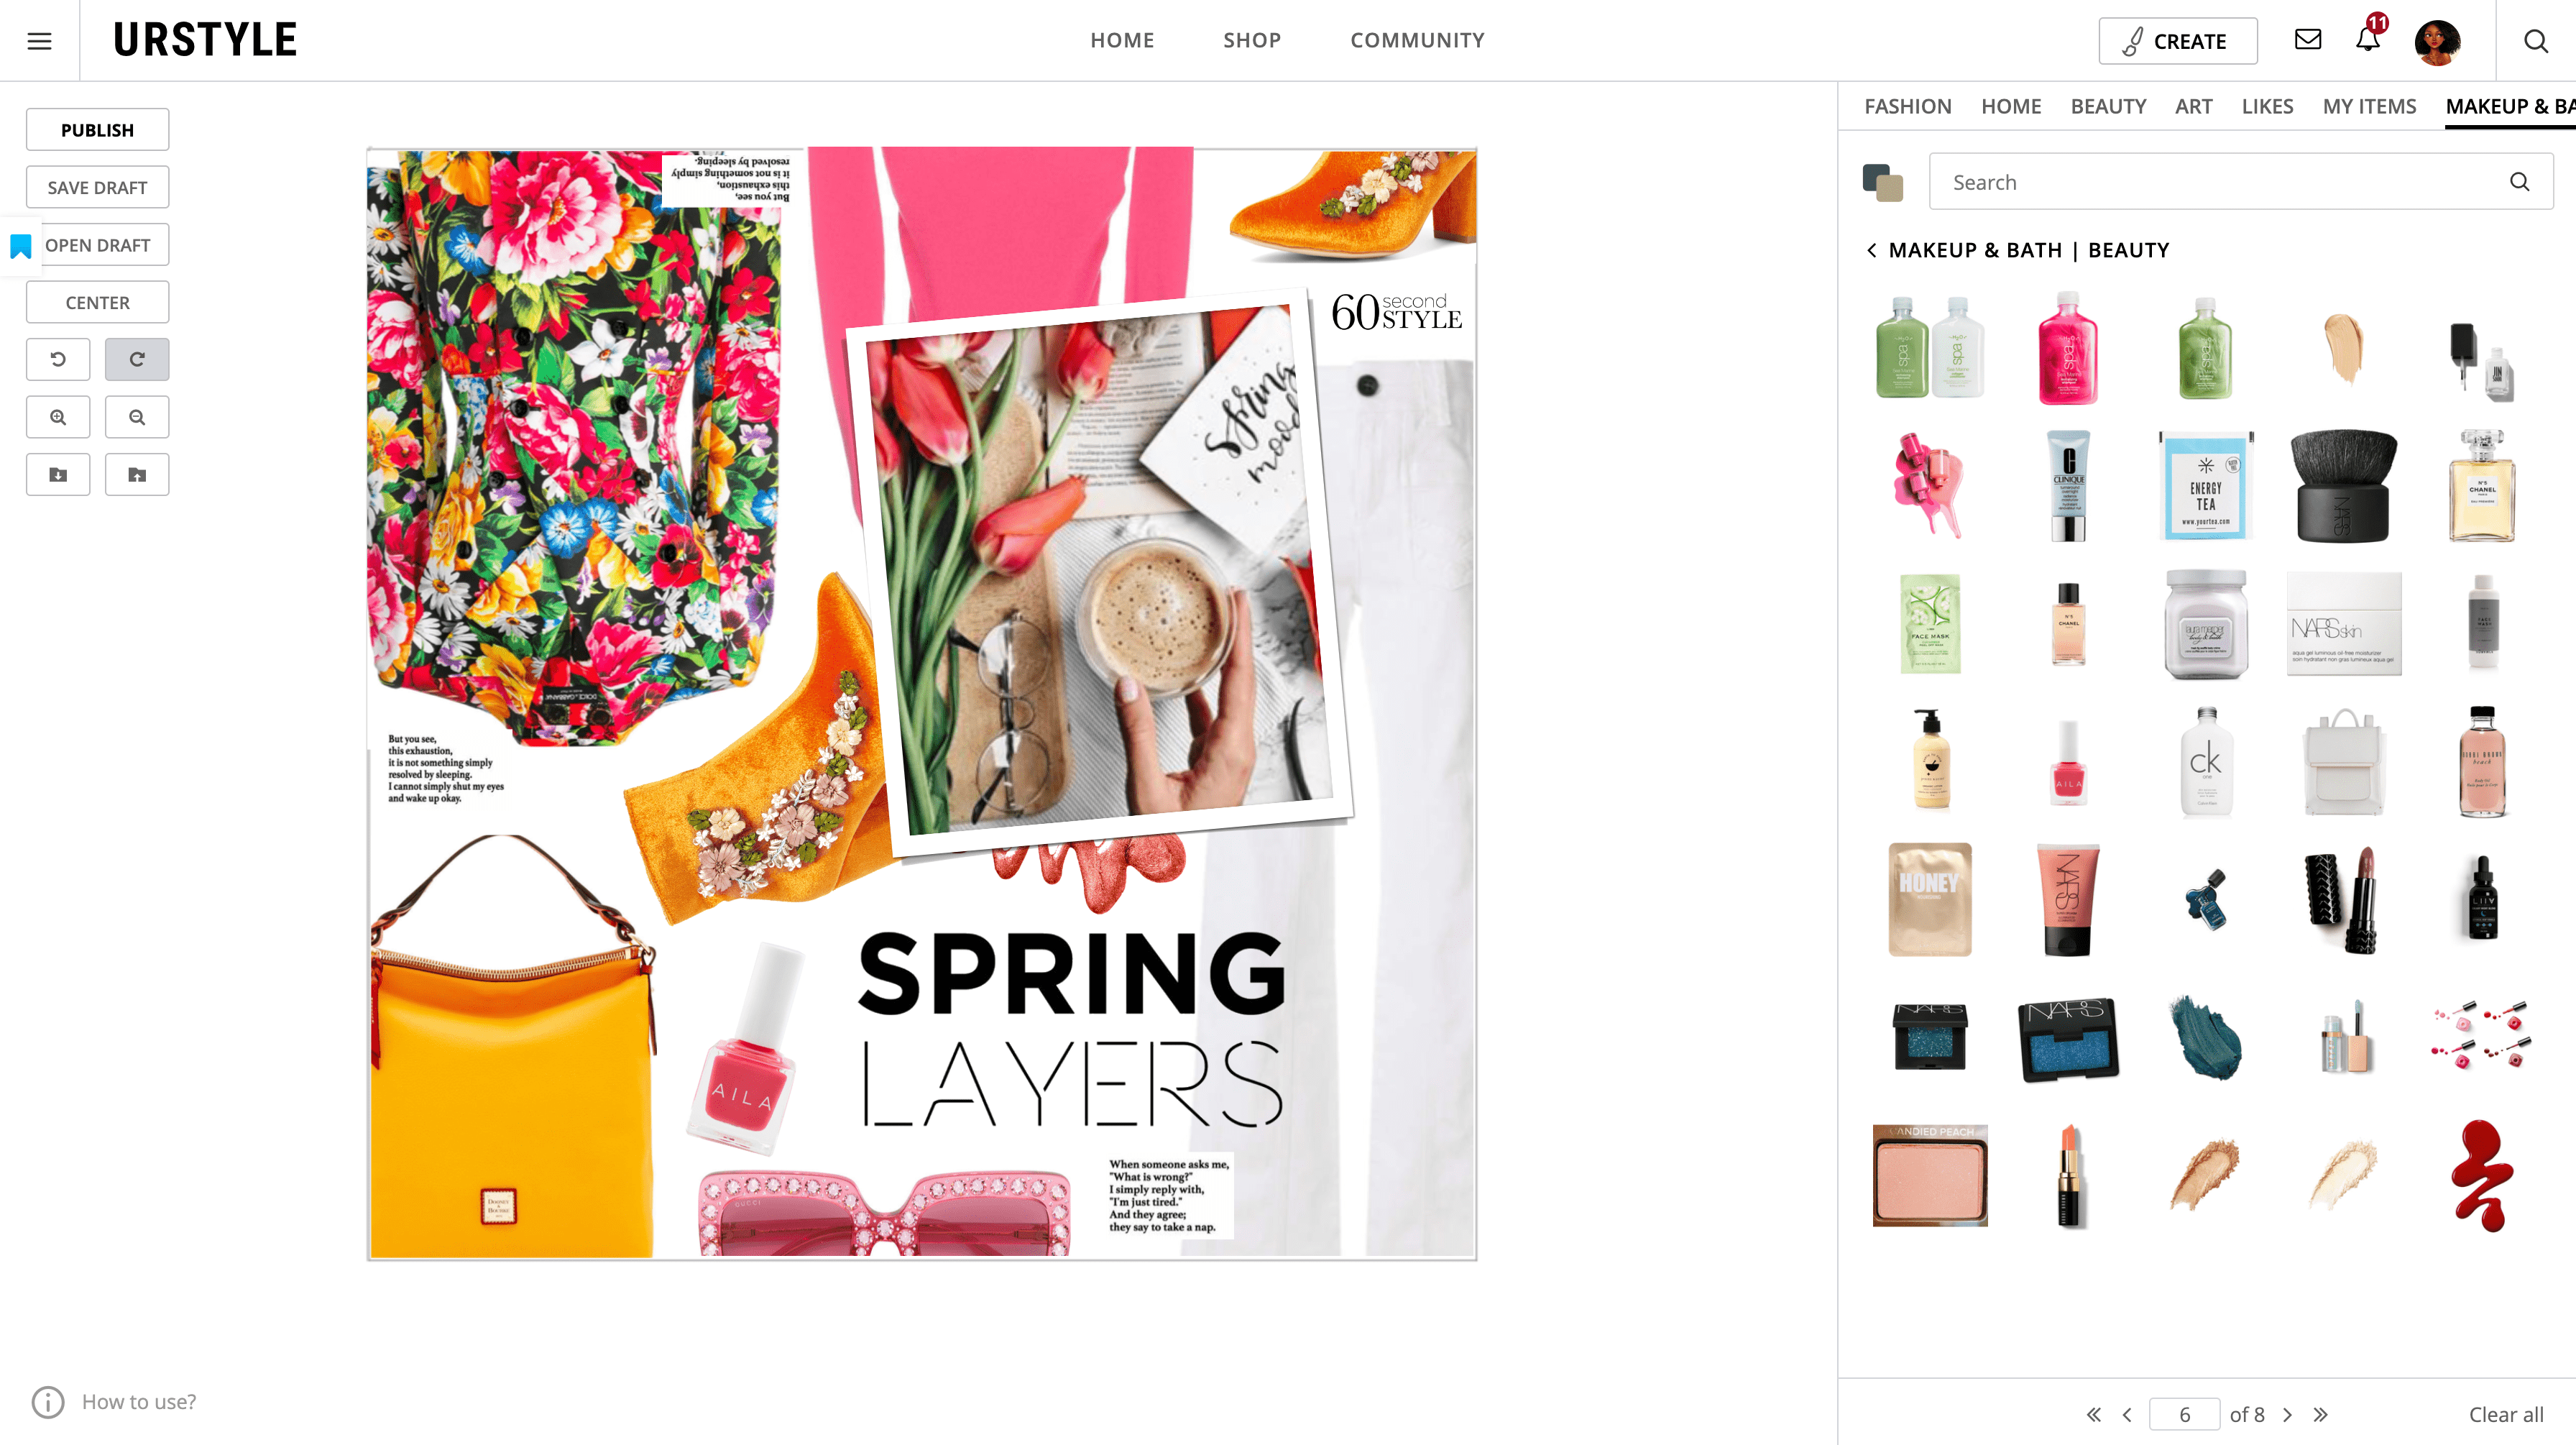
- After adding any additional accessories, (I added sunglasses since I am planning on entering the Sunglasses Combination contest) it is time to add an image! Whether or not I add an image depending on the amount of white space I see in the set, as well as personal preference. More often than not though I add an image because it makes my set more cohesive. To find images, I will look in my collections or on the art tab and search by colors.
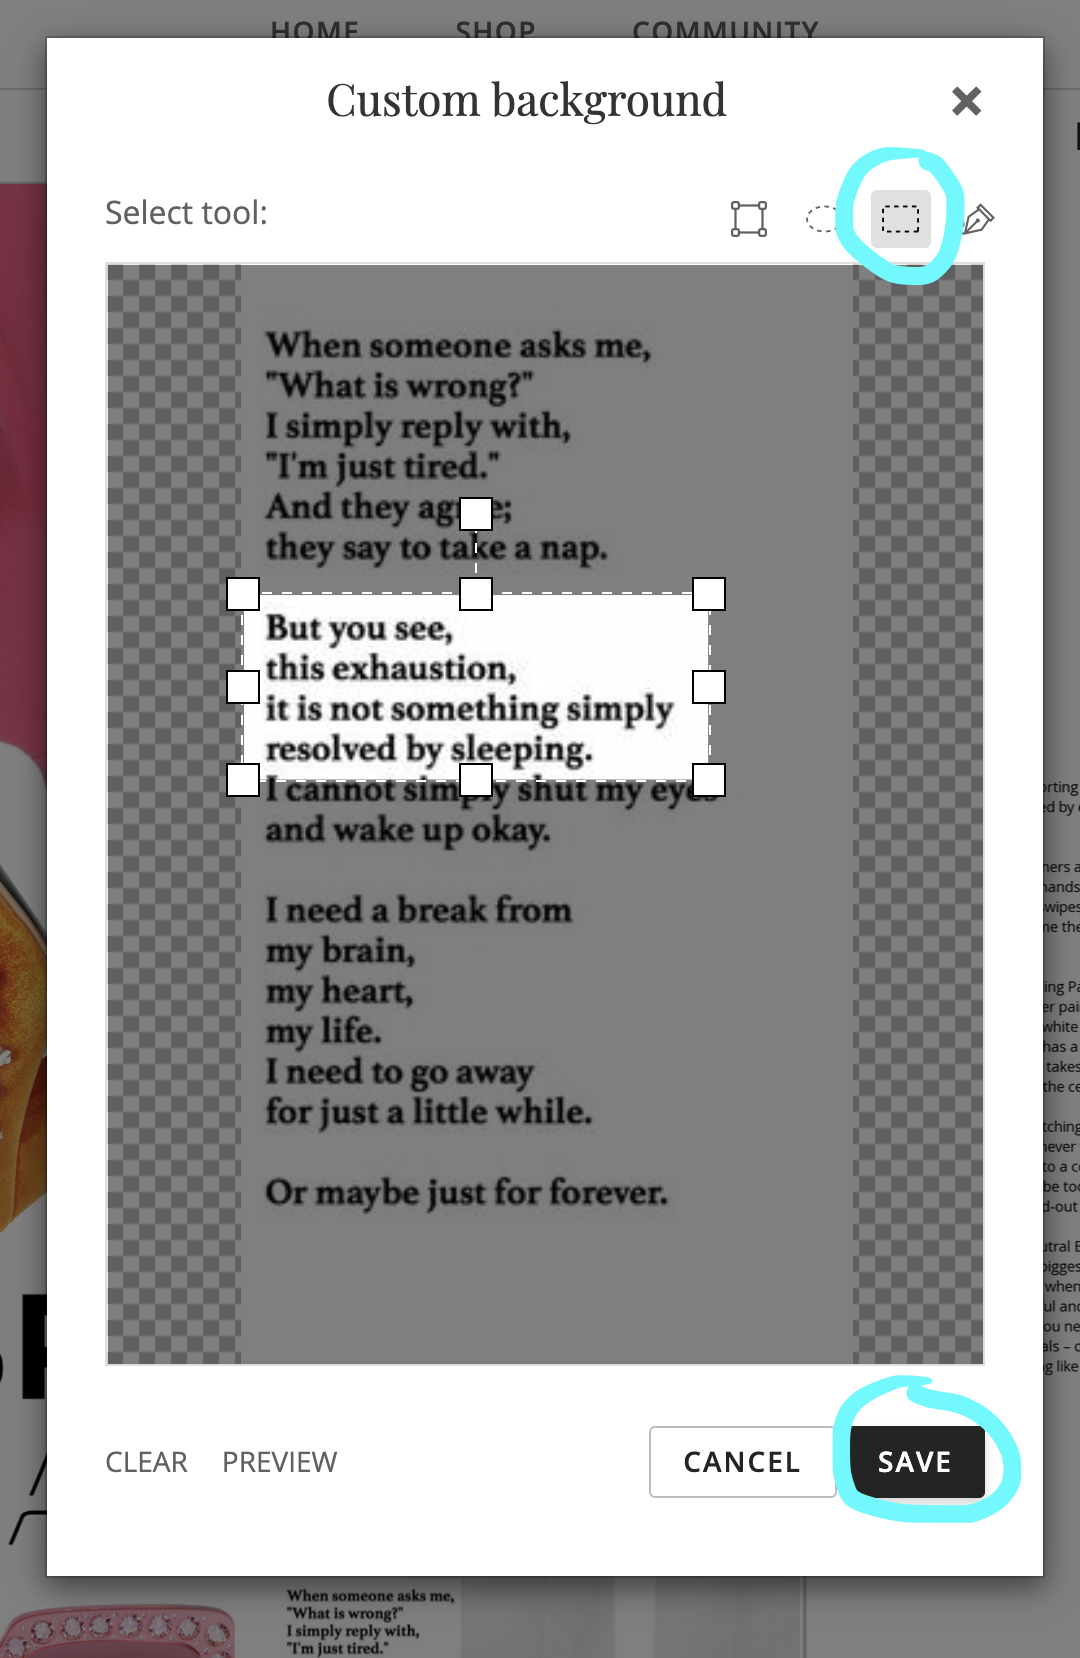
- Next, I use text to fill in remaining spots with text. To edit large items of text, I go to the same menu I used to cutoff items and do the same thing just dragging over the text I want. I usually try to use the flip, rotate, and other tools to manipulate the text so it best fills up the space. I also made a couple of quick adjustments and added a frame on my image.
- Also, usually around this point in the process I will zoom out a little bit to see what my set is looking like as a whole. When you post it, it will look smaller on your profile so zooming out will help you see pretty accurately how it will look on your profile.
- We're almost done! I still have a couple of empty spaces, so I will find small fillers to add in. Fillers can be anything from food, nature, doodles, makeup and beauty products, jewelry, or other accessories. As you can see on the right, I have collections that sort a lot of the filler items I liked by category so they are easier to look through. For this set, I am going to add this pink nail polish. However when I originally put it in and adjusted it using the transparency bar, the top of the nail polish looks too much like the background so it kept disappearing. In order to fix this, I (once again) went into the same menu I used for all of the previous times, however this time I will use the point selection tool (circled in blue). This tool allows you place dots around different points on the item and will select what is in between them. (Once again, remember that what is not shaded is what will show when you hit save!)
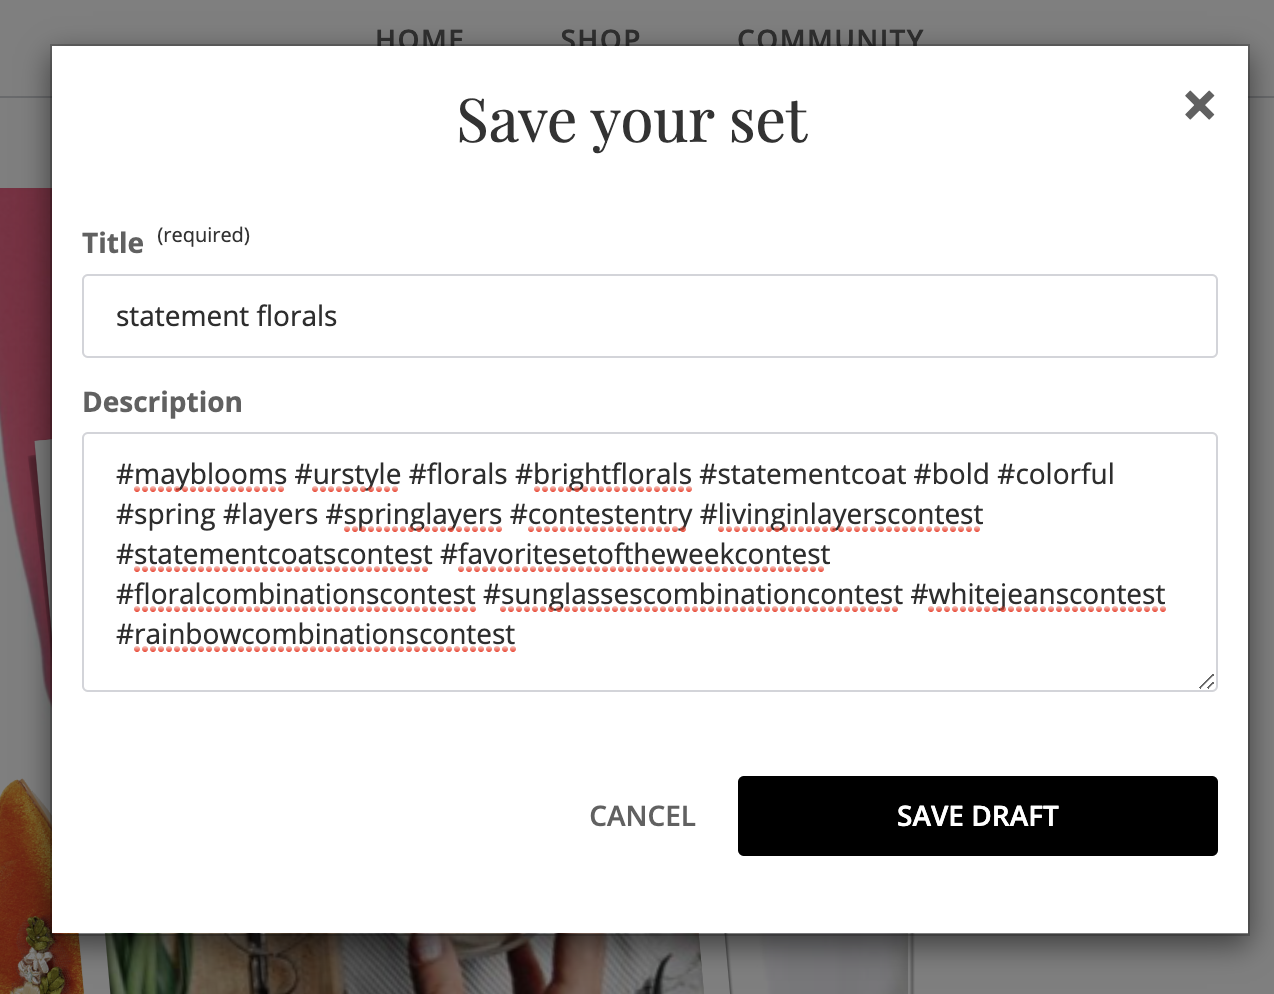
- And with that the set is complete! All that is left to do is put a title and description and save it as a draft. In the description, I usually put some tags about the set but I also put tags with all of the contests I was planning on entering this set into. THIS IS SO HELPFUL because if I don't post it until a couple of days and don't remember what contests I wanted to submit the set to, I can just look back at the description and enter the set in. Again, this is important to me because the more contests I enter the set into the more exposure and interaction the set gets!
That's all for today! I hope you guys enjoyed this and found it helpful to you and I am excited to see your creations! Also, thank you to @tammynky and many others for giving me the idea to do this blog post. Feel free to message or comment me anytime if you guys have an idea that I should do!
Have a Great Day!
~ MaybloomsComments (3) -
I love these "behind the scenes" looks at how other people make their sets, whatever the type! Always so interesting to get a little view backstage and I love the colors in this set (especially the shoes) but I will go check it out and comment on it there haha.
-
Thanks so much for taking the time to share this! Your sets are always lovely!
Dyan -
Love your sets! Great BTS look at your process. So interesting how different your create space looks vs the one on my iPad..